

🍋 Zesty Lemon Garlic Chicken in 20 Minutes 🧄🍗
1. Introduction
Imagine a bright skillet singing with sizzling butter, garlic, and the sunny glow of lemon. This lemon garlic chicken comes together in just 20 minutes, making it feel like a restaurant-worthy weeknight triumph. The air fills with citrusy perfume as the chicken browns to a juicy, glossy finish. Each bite delivers tangy brightness, aromatic garlic, and a touch of herbs that turn a simple chicken supper into an unforgettable weeknight ritual. This is comfort and freshness in one pan—the essence of a true lemon garlic chicken experience.
Whether you’re cooking for family or craving a flawless solo dinner, this recipe keeps things simple without sacrificing flavor. You’ll notice how the pan juices thicken into a silky pan sauce that coats each piece of chicken. And because it’s quick, you can serve it with a bright salad, a pot of steamed greens, or creamy pasta for a complete meal.
Thinking ahead? This dish scales beautifully for meal prep, reheating with minimal loss of tenderness. The balance of lemon, garlic, and chicken keeps things light yet satisfying. If you’re chasing a satisfying quick weeknight dinner or a healthy 20 minute dinner, this lemon garlic chicken is a dependable hero you’ll return to again and again.
2. Why You’ll Love This Recipe
- Ready in 20 minutes. A fast, weeknight-friendly centerpiece that doesn’t skimp on flavor.
- One-pan simplicity. Sear, deglaze, and finish in one skillet for easy cleanup.
- Bright, adaptable flavor. Lemon and garlic make the chicken sing, with a light, aromatic finish.
- Flexibility for busy schedules. Works as a quick weeknight dinner or a healthy 20 minute dinner when you’re short on time.
3. Ingredient Notes
Use boneless, skinless chicken breasts cut into even medallions so they cook uniformly. Pat them dry to help the sear develop a golden crust. For the lemon, opt for organic if possible so you can zest the peel for maximum brightness. A splash of chicken broth or dry white wine adds depth to the pan sauce and helps lift all those zesty flavors.
Quality olive oil matters here. A good extra-virgin olive oil brings fruity notes that complement garlic without overpowering it. If you prefer, you can swap half of the oil for a touch of butter at the end for a silkier sauce. Fresh parsley or thyme adds a pop of color and a hint of herbal aroma that brightens the finish.
Optional add-ins: a pinch of chili flakes for a gentle heat, or a splash of cream for a creamy variation. If you’re avoiding dairy, simply skip the butter and use a little extra broth to finish the sauce. For a different citrus twist, a little lime zest can be a playful alternative.
4. Kitchen Tools You Need
For best results, you’ll want a reliable skillet and a few smart tools. A quality nonstick skillet helps you achieve that flawless sear without sticking. If you’re exploring shortcuts or want extra crisp, an air fryer is a great optional companion.
Tools to consider (affiliate links):
- Compact 6-in-1 Digital Air Fryer by Amazon Basics — Perfect for crisping chicken edges and reheating leftovers with less oil.
- T-fal 14-Piece Hard Anodized Nonstick Cookware Set — A sturdy skillet set that performs beautifully on the stovetop for searing and simmering.
- Ninja Foodi Smart XL Indoor Grill & Air Fryer Combo — If you love a deeper sear and want extra versatility for weeknight dinners.
These tools make the workflow smoother, but you can absolutely start with a dependable 10–12 inch skillet and a basic stove-friendly setup. If you’re curious about pairing this chicken with other quick dishes, check out our creamy tomato garlic pasta for a flavor-packed duo, or explore a light snack with our crispy salt-and-vinegar zucchini chips to round out the meal.
5. How to Make [Recipe Name]
Phase 1 — Prep and season
Pat the chicken dry and season with salt and pepper. Zest the lemon, then juice it. Have the garlic minced and ready; the aroma of garlic waking the pan is your cue to keep the heat steady. Gather the broth (or wine) and fresh herbs so everything is within arm’s reach.
Phase 2 — Sear the chicken
Heat a tablespoon of olive oil in a skillet over medium-high heat. When the oil shimmers, add the chicken in a single layer. Don’t crowd the pan—let each piece form a golden crust. You’re aiming for a rich caramel color and a little crisp along the edges. Flip and brown the other side, then set the chicken aside briefly.
Phase 3 — Build the pan sauce
Lower the heat slightly and add a touch more oil. Add minced garlic and zest for a bright, fragrant bloom. Deglaze the pan with chicken broth or white wine, scraping up all the brown bits. The aroma will deepen as the liquid reduces by about a third, forming a glossy base for the sauce.
Phase 4 — Finish and serve
Return the chicken to the pan, spooning sauce over the pieces. Simmer for 2–3 minutes until the chicken is cooked through and the sauce thickens slightly. Stir in lemon juice and chopped herbs, tasting for brightness and balance. The skillet should smell citrusy and inviting, with a velvety glaze clinging to the chicken. Serve immediately with a bright green salad or a side of pasta for a complete meal. If you like, pair with a crisp veggie side, or try a quick drizzle of the remaining pan sauce over roasted vegetables for extra punch.
For a variation, you can read about our no-bake treats after your meal, or explore another savory option like our Big Mac wraps for a different flavor profile.
6. Expert Tips for Success
- Pat the chicken dry and season in advance to promote a crisp sear and even browning.
- A hot skillet is your friend; don’t overcrowd the pan or the chicken will steam instead of sear.
- Use fresh lemon zest to unlock the brightest citrus aroma—avoid relying solely on juice for flavor.
- Deglaze with a flavorful liquid to lift those delicious browned bits; it makes the sauce richer without extra fat.
- Finish with a quick rest of the chicken off the heat so juices redistribute for maximum tenderness.
- If you’re cooking dairy-free, skip butter and add a splash more broth at the end to mimic creaminess.
7. Variations & Substitutions
- Swap chicken breasts for boneless skinless thighs for extra juiciness.
- Use lime or orange zest for a different citrus note.
- Add chili flakes or a pinch of paprika for subtle heat.
- Skip the wine or broth and use a splash of white grape juice with a touch of extra lemon juice for a lighter sauce.
- Serve over whole-grain rice, quinoa, or roasted vegetables to vary textures.
8. Storage & Reheating
Store leftovers in an airtight container for up to 3 days in the refrigerator. Reheat gently on the stove over low heat or in a 300°F (150°C) oven until warmed through, then spoon over any remaining sauce. The flavors often taste even brighter the next day, so consider doubling the recipe if you anticipate lunch leftovers.
9. FAQ
Q: Can I use chicken thighs instead of breasts?
A: Yes. Boneless, skinless thighs stay juicy and cook a bit faster in a pan; just adjust the sear time to prevent overcooking.
Q: Can I make this dairy-free?
A: Absolutely. Skip any butter and finish with a touch more broth or olive oil to keep the sauce silky.
Q: What should I serve with lemon garlic chicken?
A: A crisp salad, steamed greens, or pasta with a light olive oil finish pairs wonderfully. For a complete meal, try pairing with the creamy tomato garlic pasta recipe linked above, or serve alongside roasted vegetables.
Q: Can I freeze leftovers?
A: Yes, store in an airtight container for up to 2 months. Thaw in the fridge overnight and reheat gently to preserve moisture.
10. Conclusion
In just 20 minutes, you’ve created a bright, comforting lemon garlic chicken that tastes like a win on a busy night. The citrus aroma, garlicky punch, and silky pan sauce come together to make every bite vibrant and satisfying. Save this recipe for your weekly menu and share the joy of a quick weeknight dinner that feels special. If you enjoyed this, explore more of our quick and flavorful ideas in our recipe collection.
Print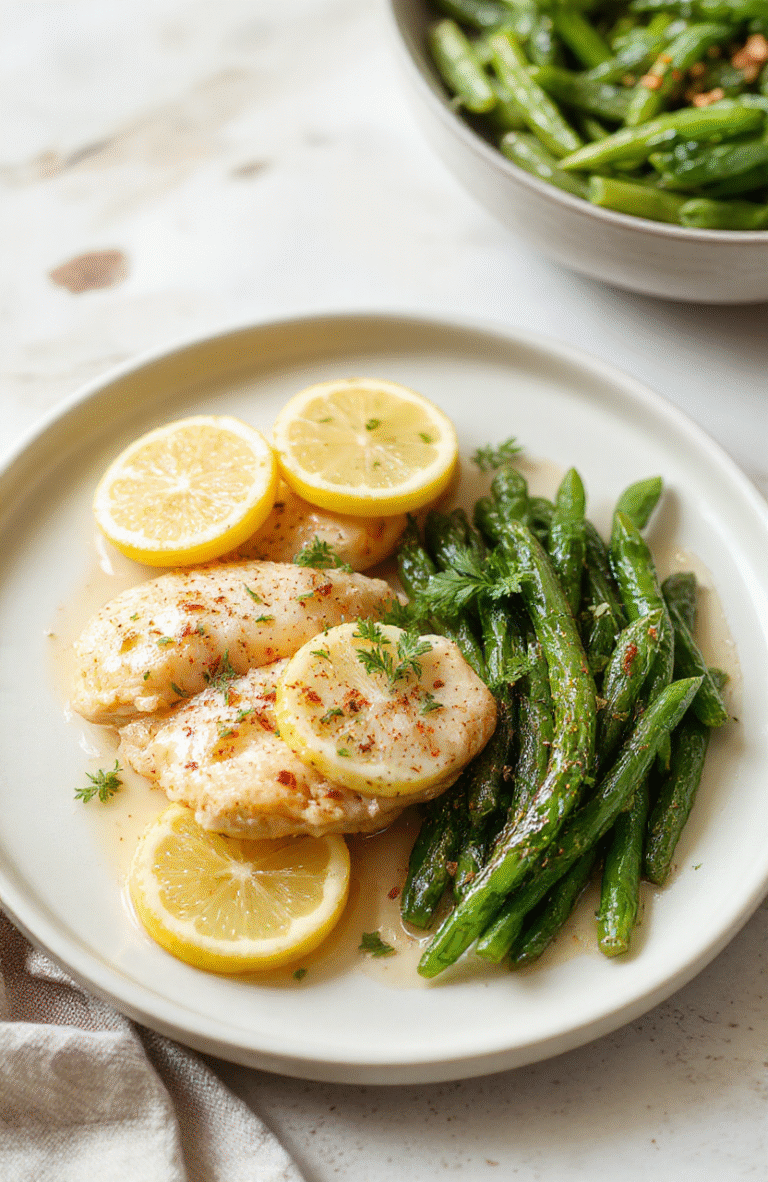
Zesty Lemon Garlic Chicken in 20 Minutes
A fast, flavorful skillet dinner of lemony garlic chicken with a bright pan sauce. Serves 4 with easy sides for a complete healthy weeknight meal.
- Total Time: 20 mins
- Yield: 4 servings
Ingredients
- 4 boneless, skinless chicken breasts (about 1.5 lb / 680 g)
- 2 tablespoons olive oil
- 3 cloves garlic, minced
- Zest of 1 lemon and 2 tablespoons fresh lemon juice
- Salt and pepper to taste
- 1/4 teaspoon red pepper flakes (optional)
- 1/4 cup chicken broth or dry white wine (optional for sauce)
- Fresh parsley, chopped for garnish
Instructions
- Place chicken breasts between two sheets of plastic wrap and gently pound to an even 1/2 inch thickness. Season with salt and pepper.
- Heat olive oil in a large skillet over medium-high heat. Sear the chicken 4-5 minutes per side until cooked through and golden. Transfer to a plate.
- In the same skillet, add minced garlic and sauté 30 seconds until fragrant. Stir in lemon juice, lemon zest, and optional broth or wine; simmer 1-2 minutes to reduce slightly.
- Return the chicken to the pan, spooning the sauce over top. Cook 1 minute more to coat. Garnish with parsley and serve.
Notes
- For extra brightness, add a splash of capers or a splash of white wine to the sauce.
- Use thinner chicken cutlets to shave minutes off cook time.
- Serve with steamed vegetables or a simple salad for a complete meal.
- Prep Time: 10 mins
- Cook Time: 10 mins
- Method: Stovetop
- Cuisine: American
- Diet: Gluten-Free, Low-Carb
Nutrition
- Serving Size: 1 serving
- Calories: 310 Kcal
- Sugar: 2 g
- Sodium: 420 mg
- Fat: 14 g
- Saturated Fat: 3 g
- Unsaturated Fat: 9 g
- Trans Fat: 0 g
- Carbohydrates: 6 g
- Fiber: 0 g
- Protein: 40 g
- Cholesterol: 110 mg