
🍓 Healthy No-Bake Cheesecake Jars: Guilt-Free Treat
1. Introduction
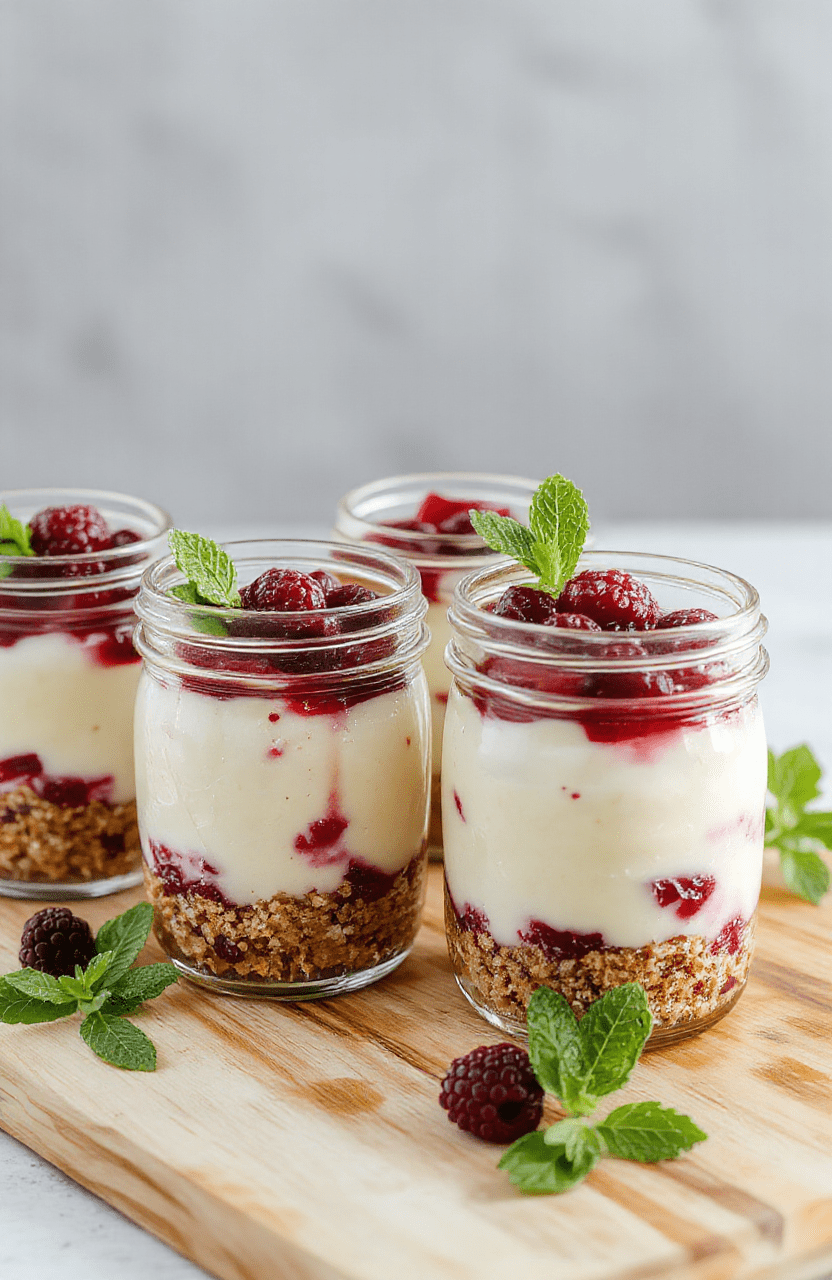
This healthy no-bake cheesecake jars recipe invites you to slow into a silky, tangy moment that feels indulgent but stays light on the palate. Imagine a creamy filling tucked over a crumbly crust, all tucked into individual jars for easy, portable snacking. It’s the kind of guilt-free dessert you can enjoy after a busy day without sacrificing flavor or texture.
The beauty of this no-bake approach is that you don’t need an oven to achieve a velvety, luscious finish. Fresh lemon zest brightens the filling, while a hint of vanilla whispers through the cream cheese and yogurt. If you’re curious about more quick, wholesome sweets, you might also enjoy our pillowy-soft chocolate chip milk buns slowly rising on the counter here.
2. Why You’ll Love This Recipe
- Ready in under 30 minutes, plus chilling time for a perfect set.
- No oven required, making it ideal for warm days or small kitchens.
- Portable individual jars for portion control and on-the-go treats.
- Crèmeux filling with Greek yogurt, cream cheese, and a bright lemon finish.
- Customizable toppings: berries, citrus zest, or a chocolate drizzle.
3. Ingredient Notes
For the crust, a simple crumb base of graham crackers or digestive biscuits provides a toasty contrast to the creamy filling. Opt for crackers with a fine grind so the crust packs evenly into the jars. A touch of melted butter binds the crumbs into a cohesive, bite-sized layer that doesn’t crumble when spooned.
The filling relies on a balance of cream cheese for structure and Greek yogurt for tang. Full-fat cream cheese yields the richest texture, while a thick, plain Greek yogurt lightens the richness slightly and adds a silkier mouthfeel. A splash of vanilla and a pinch of salt deepen flavor, and lemon zest or a tiny squeeze of lemon juice keep the sweetness in check.
Quality matters here: choose real vanilla extract, fresh lemons, and creamy yogurt for best results. If you’re gluten-sensitive, swap graham crackers for a gluten-free biscuit crumble and ensure the butter is dairy-safe for your needs. Looking for a different flavor profile? Try a berry compote on top for a natural sweetness and color boost. For more wholesome bites, explore other quick meals like our juicy garlic butter steak and potatoes here.
4. Kitchen Tools You Need
Along with basic bowls and a whisk, a few dependable tools help this recipe come together effortlessly. The right gear keeps the texture smooth and the assembly tidy, especially when making multiple jars at once.
- KitchenAid Artisan 5-Quart Stand Mixer in Scorched Orange — Whips cream cheese and yogurt to a flawless, airy whip in seconds, ensuring a silky filling every time.
- Ninja Mega Kitchen Power System — A powerful blender option if you want to blend smooth fruit toppers or a quick whipped topping.
- Compact 6-in-1 Digital Air Fryer by Amazon Basics — Handy for toasting or crisping a crumble topping if you prefer a little texture on top.
- Deluxe 33-Piece Silicone Utensil Set — A versatile set to crush crackers, scrape bowls, and smooth layers without scratching.
5. How to Make Healthy No Bake Cheesecake Jars Guilt Free Treat
Phase 1: Make the crust
Crush graham crackers or your preferred biscuit until you have fine crumbs. Mix with a little melted butter and a pinch of sugar until the mixture clumps when pressed. Spoon a generous layer into the bottom of each jar and press down firmly with the back of a spoon for a compact, even base. You want that satisfying crack as you bite into the crust when you take your first spoonful.
Phase 2: Whip the filling
Beat softened cream cheese with thick Greek yogurt until completely smooth and billowy. Fold in a touch of vanilla, a pinch of salt, and lemon zest or a light squeeze of juice for brightness. Aim for a glossy, airy texture—this is where the filling feels almost cloud-like on the palate.
Phase 3: Layer and chill
Divide the filling among the jars and spread it to the edge of the crust without overfilling. If you like, swirl in a tiny amount of berry jam for color and a hint of fruity sweetness. Seal the jars and refrigerate for at least 2–4 hours, or until the filling firms to a clean, spoon-friendly set. The chill brings out a soft tang and a clean, creamy finish.
Phase 4: Finish and serve
Top with fresh berries, a delicate drizzle of honey, or a few lemon zest shavings just before serving. The aroma of citrus and vanilla should mingle with the cool, creamy cream cheese base, inviting you to take a bite. If you want more inspiration, check our quick-breeze protein-packed options in other posts like our juicy garlic butter steak and potatoes.
6. Expert Tips for Success
- Let cream cheese and yogurt come to room temperature before mixing; this prevents lumps and yields a smoother filling.
- Soft peaks are perfect—overmixing can whip the filling into stiffness, so stop when it’s just smooth and glossy.
- Drain any excess whey from yogurt if it looks loose; a thicker base makes the filling hold its shape longer.
- Use fresh lemon zest for fragrance; avoid the white pith, which can taste bitter.
- Press crust firmly into the jars to form a stable base; a light skewer can help even out any air pockets.
- Chill time is essential—plan at least a few hours so the flavors meld and the texture sets properly.
- For dairy-free options, swap in a dairy-free cream cheese and yogurt; add a little dairy-free yogurt to maintain creaminess.
7. Variations & Substitutions
- Crust swap: Use crushed almond biscuits or gluten-free crackers for a gluten-free crust.
- Flavor twist: Add a dash of berry puree to the filling for a fruity version; or swap lemon for lime for a citrusy zing.
- Non-dairy version: Use plant-based cream cheese and yogurt, plus a splash of vanilla and lemon zest for brightness.
- Topping ideas: Fresh berries, edible flowers, a light dusting of cocoa, or a swirl of fruit compote.
8. Storage & Reheating
Store the cheesecake jars in the refrigerator, tightly covered, for up to 3–4 days. No reheating is needed or recommended for these no-bake jars—the charm is in their cool, creamy texture. If topping ahead of time, keep toppings separate and add just before serving to maintain texture.
9. FAQ
Is this a healthy no-bake cheesecake?
Yes, it’s a lighter take thanks to Greek yogurt and reduced sugar, while still delivering that indulgent creaminess. You can further tailor sweetness by adjusting the honey or swapping in a sugar-free option if you like.
Can I make this dairy-free or vegan?
Absolutely. Use dairy-free cream cheese and yogurt, and choose a dairy-free butter or coconut oil for the crust. You may need to experiment with sweeteners to balance tang and sweetness to your liking.
Can I freeze the jars for later?
Freezing is possible, but texture may change slightly after thawing. If you plan to freeze, use shorter storage times and thaw in the fridge before serving to preserve creaminess.
What crust options work best?
Graham crackers are classic, but digestive biscuits, gluten-free crackers, or almond-based crusts all work well. The key is to crush finely and press firmly to form a sturdy base.
10. Conclusion
Healthy no-bake cheesecake jars offer a bright, creamy finish with a crisp crust and dairy-friendly tang. They’re simple, customizable, and perfect for meal-prep or a quick dessert pick-me-up. Enjoy the creamy texture, the pop of citrus, and the portable convenience—you’ve earned a guilt-free treat that tastes like a special indulgence.
Print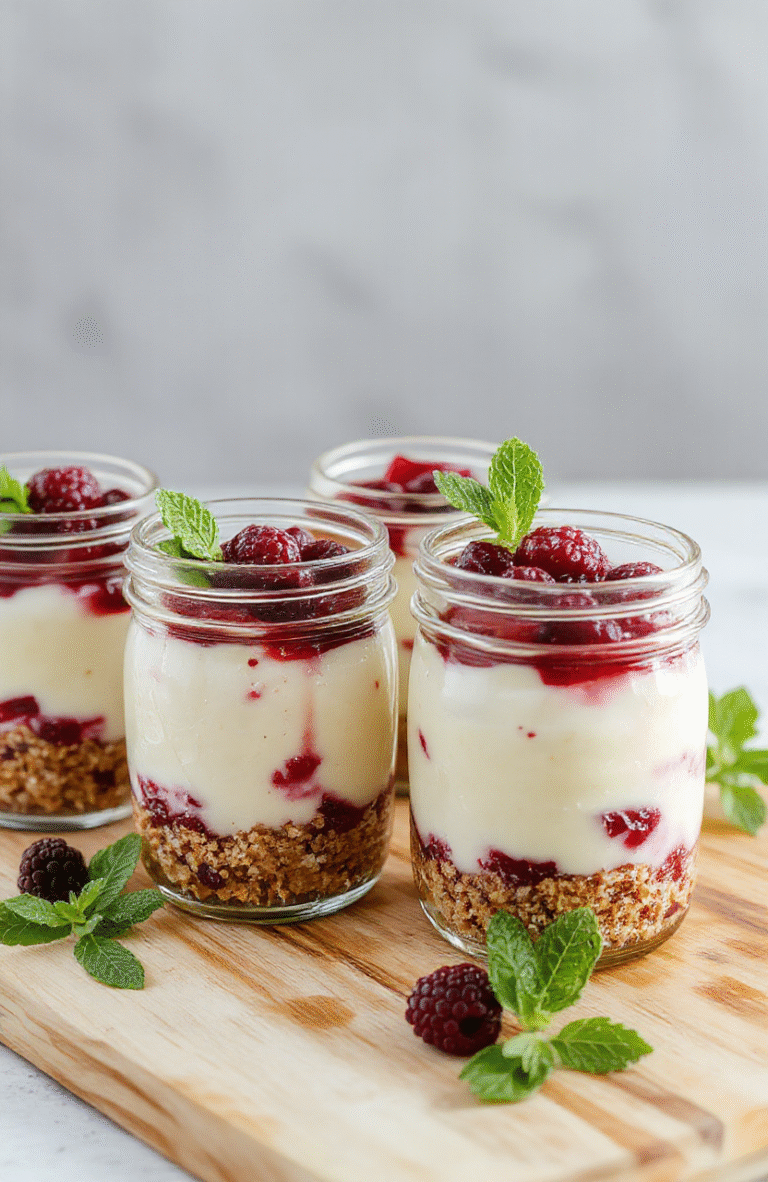
Healthy No Bake Cheesecake Jars Guilt Free Treat
A quick, no-bake cheesecake jars recipe with a crumbly crust, creamy filling, and fresh berry topping. Lightweight, dairy-friendly options available, suitable for meal prep and healthy entertaining.
- Total Time: 2 hours 15 minutes
- Yield: 4-6 servings
Ingredients
- 1 1/2 cups graham cracker crumbs
- 3 tablespoons unsalted butter, melted
- 8 ounces cream cheese, softened
- 1/2 cup plain Greek yogurt
- 1/4 cup honey
- 1 teaspoon vanilla extract
- 1/2 teaspoon lemon zest
- Pinch salt
- 1 cup mixed berries for topping
Instructions
- In a bowl, combine graham cracker crumbs with melted butter until evenly moistened.
- Divide crust among 4-6 jars, pressing lightly to form a bottom layer.
- Beat cream cheese, Greek yogurt, honey, vanilla, lemon zest, and salt until smooth and creamy.
- Spoon filling over the crusts, then refrigerate at least 2 hours to set.
- Top with mixed berries before serving.
Notes
- Chill time: at least 2 hours, overnight preferred.
- For dairy-free, substitute with plant-based cream cheese and yogurt alternatives.
- Feel free to swap fruit toppings with your favorite berries or sliced peaches.
- Prep Time: 15 minutes
- Cook Time: 0 minutes
- Method: No-bake
- Cuisine: American
- Diet: Vegetarian
Nutrition
- Serving Size: 1 jar (180 g)
- Calories: 240 Kcal
- Sugar: 14 g
- Sodium: 120 mg
- Fat: 12 g
- Saturated Fat: 7 g
- Unsaturated Fat: 5 g
- Trans Fat: 0 g
- Carbohydrates: 22 g
- Fiber: 1 g
- Protein: 6 g
- Cholesterol: 40 mg