
🎉 Crunchy Beef Cones: Fun & Easy Party Appetizer 🥳🍢
1. Introduction
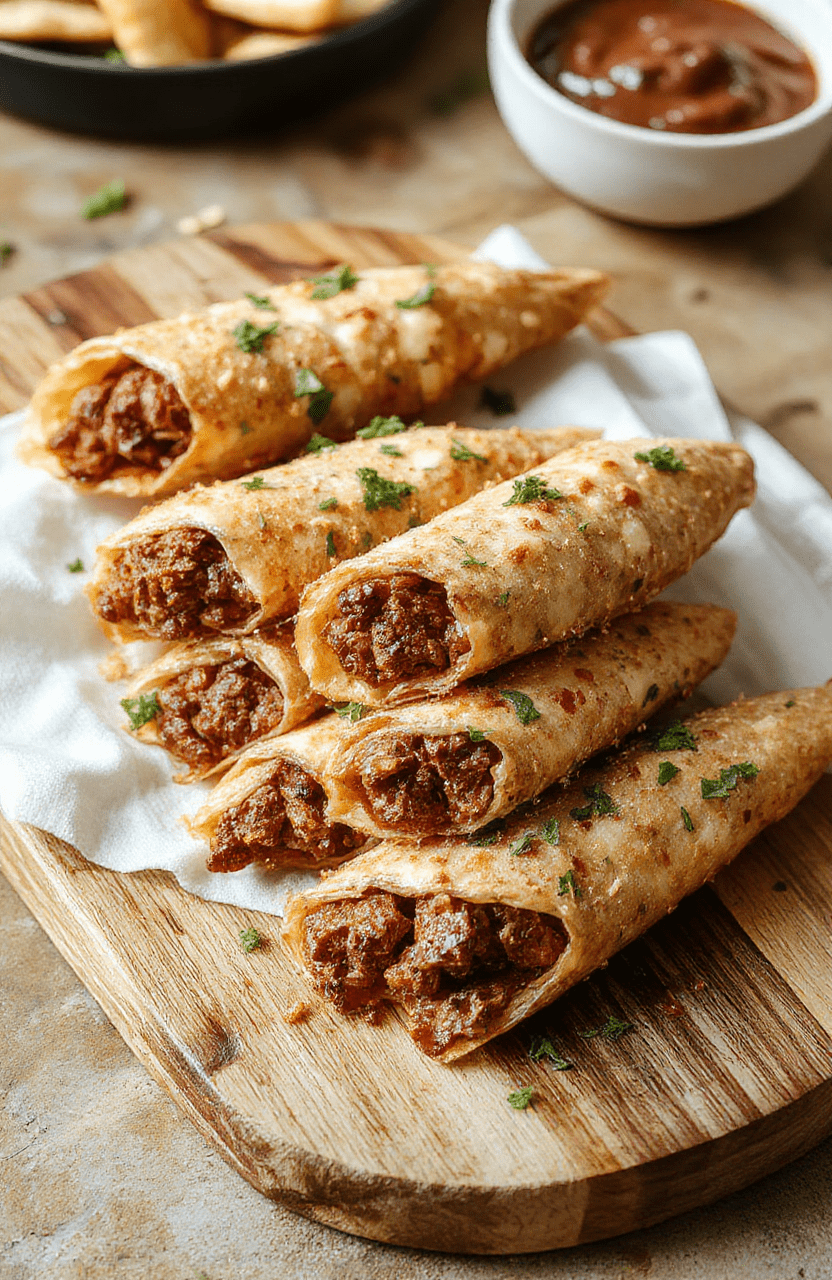
Imagine crispy beef cones arriving at your table, their shells golden and crackling as you bite in. The savory beef filling carries taco-seasoning notes, while melted cheese adds a silky contrast. This playful starter is perfect for gatherings, delivering big flavor with minimal effort. If you’re after a social, crowd-pleasing appetizer, you’ve found it: crispy beef cones that taste like a party in every bite.
The texture contrast—crisp shells with juicy beef—makes them a hit with guests of all ages. They’re easy to customize with your favorite toppings, from a bright salsa to a cool avocado crema. And yes, you can prep components ahead for a stress-free party setup.
2. Why You’ll Love This Recipe
- Ready in about 30 minutes from start to finish.
- Eye-catching, fun-to-eat presentation that starts conversations.
- Make-ahead components with a quick finish right before serving.
- Versatile fillings and toppings to suit any party theme.
Tip: these crispy beef cones also fit nicely under the umbrella of popular beef appetizers recipe ideas for entertaining. For a different spin, you can explore other quick bites like our creamy chicken Alfredo pizza or no-bake treats that Travel-friendly snacks—see the internal links below.
3. Ingredient Notes
Key to a crisp, flavorful result is choosing the right shells. Look for mini cone-shaped pastry cups or puff pastry cones that bake up crisp and hold their shape. If you find only flat wrappers, you can roll strips of puff pastry into cone forms and bake until deeply golden.
For the filling, opt for lean ground beef or a mix of beef with pork for extra depth. A balanced spice blend—chili powder, cumin, smoked paprika, garlic, and a pinch of cayenne—delivers warmth without overwhelming the beef. Use a bright tomato sauce or salsa to keep things saucy, then fold in shredded cheese to melt into gooey goodness.
Herbs and toppings finish the dish beautifully. Fresh cilantro, lime juice, and a dollop of sour cream or avocado crema brighten the flavors and add creaminess. If you’re chasing high-quality options, consider grass-fed beef and aged cheddar for richer notes. For more ideas, check out our related recipes: Creamy Chicken Alfredo Pizza, Peanut Butter Oat Cups, and Fluffy Oatmeal Crepes.
4. Kitchen Tools You Need
Having the right tools makes Assembly quick and yields perfectly crisp shells every time. A compact air fryer or convection oven helps you bake shells evenly without overheating the crowd. For a seamless setup, consider these essentials:
- Compact 6-in-1 Digital Air Fryer by Amazon Basics — perfect for crisping shells evenly and reducing油 fat.
- T-fal 14-Piece Hard Anodized Nonstick Cookware Set — great for sautéing the beef filling with minimal sticking.
- Ninja Foodi Smart XL Indoor Grill & Air Fryer Combo — versatile for browning filling and finishing shells in one station.
- KitchenAid Artisan 5-Quart Stand Mixer in Scorched Orange — handy for whipping optional toppings or making avocado crema smoothly.
- Ninja 12-in-1 Smart Double Oven with FlexDoor & Air Fry — extra oven space for busy party days.
These tools help you stay efficient, especially when you’re juggling several appetizers at once. If you’re new to hosting, a few well-chosen gadgets can elevate your game without adding stress.
5. How to Make Crunchy Beef Cones: Fun & Easy Party Appetizer
Phase 1 — Prep the beef filling
Heat a skillet over medium-high and brown the ground beef with finely chopped onion and minced garlic. Let the meat render until the liquid cooking juices evaporate and the beef begins to become a loose crumble. Stir in chili powder, cumin, smoked paprika, salt, and pepper, then add a splash of tomato sauce or salsa. Simmer until the mixture thickens and smells warmly spiced. You’re looking for a glossy, cohesive filling that still has some bite.
Phase 2 — Make or prepare the cone shells
If you’re using store-bought mini cone cups, skip to the next phase. For puff pastry cones, cut sheets into strips, wrap them into cone shapes, and brush with a beaten egg for shine. Bake at 375°F (190°C) until deeply golden and crisp, about 12–14 minutes. Let shells cool briefly so they’re sturdy enough to hold the filling without cracking.
Phase 3 — Assemble and finish
Fill each cone with a generous spoonful of the seasoned beef. Top with shredded cheddar or pepper jack and slide them under a quick hot heat for just a moment to melt the cheese. Finish with a dollop of sour cream or a drizzle of avocado crema, plus chopped cilantro and a squeeze of lime. Serve immediately while the shells stay crisp and the cheese is gooey.
6. Expert Tips for Success
- Keep shells as dry as possible before filling to preserve crunch. If they’re a touch soft, a brief bake at 350°F (175°C) can re-crisp them just before serving.
- Brown the beef thoroughly for depth of flavor, but don’t overcook—you want juicy filling that still crumbles well.
- Under-season the filling a bit; you can finish with salt at the end after tasting, since the shells and toppings add their own saltiness.
- Assemble close to serving time to avoid soggy shells. You can prep fillings and toppings ahead; keep shells in a dry, cool place until assembly.
7. Variations & Substitutions
Make it dairy-free by using dairy-free cheese shreds and a dairy-free crema. For a lighter option, swap ground beef for ground turkey or chicken and bump up the spices. Vegetarian version? Sautéed mushrooms, black beans, and corn with the same spice blend create a satisfying fallback. If you love heat, add jalapeños or a drop of hot sauce to the beef filling. For a different theme, try a Mediterranean twist with spiced lamb, feta, and a mint yogurt topping.
If you’re chasing more family-friendly appetizers ideas, check our related posts as noted in the Ingredient Notes: Creamy Chicken Alfredo Pizza, Peanut Butter Oat Cups, and Fluffy Oatmeal Crepes for quick healthy breakfasts.
8. Storage & Reheating
Store the beef filling separately from the shells to keep them crisp. Reheat the filling in a skillet over medium heat until warmed through. Re-crisp shells in the oven for 5–7 minutes at 350°F (175°C) before filling. Assemble only what you plan to serve to avoid soggy shells lingering on the platter.
9. FAQ
Q: Can I make the shells a day ahead? A: Yes, bake and cool the shells, then store in a dry container. Assemble and fill just before serving to maximize crunch.
Q: Can I freeze the fillings? A: You can freeze the cooked beef filling, then thaw and reheat gently. Avoid freezing the shells, which can lose their crispness.
Q: What if I don’t have cone shells? A: Use small tortilla cups or bake puff pastry into cone shapes. The technique is flexible and forgiving.
Q: Are these suitable for kids? A: Yes, you can adjust the spice level and toppings to suit younger palates.
10. Conclusion
Crunchy Beef Cones deliver big party flavor with minimal effort. The combination of crispy shells, seasoned beef, and melty cheese creates a memorable, crowd-pleasing starter. With a few smart ingredient choices and the right tools, you can serve this playful appetizer at your next gathering and hear the cheers from guests as they reach for seconds.
Print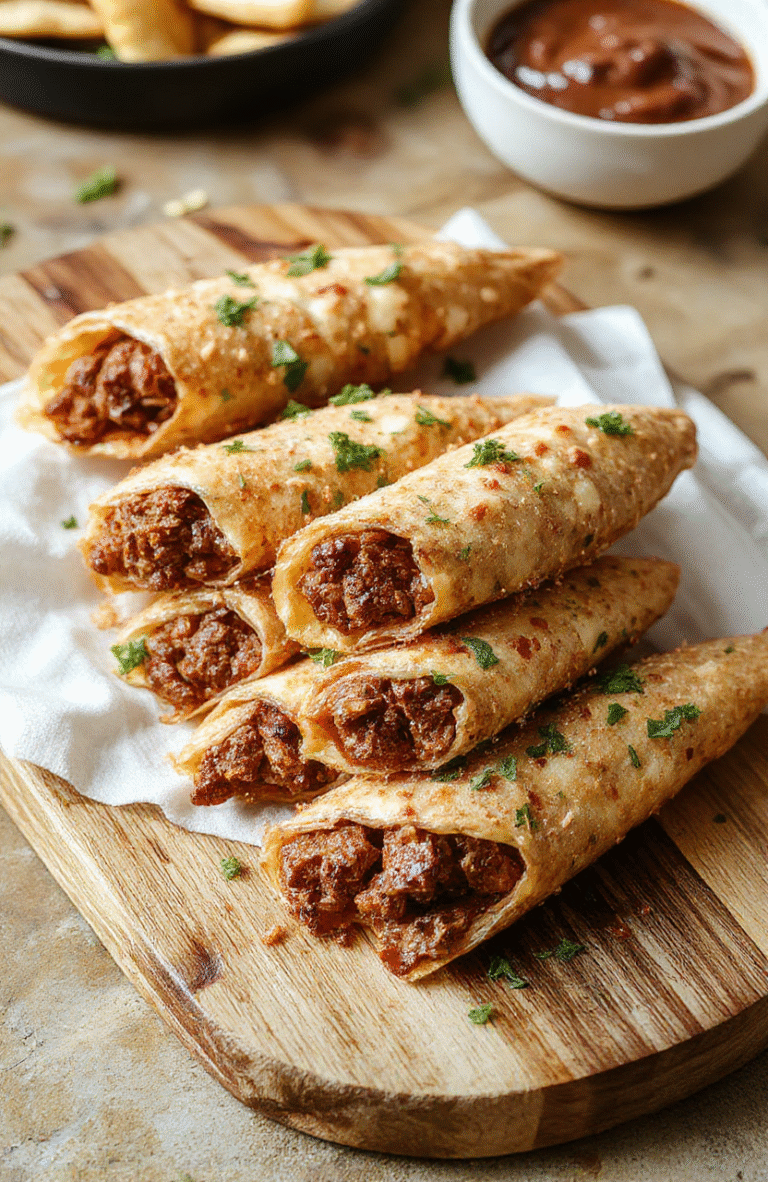
Crunchy Beef Cones: Fun & Easy Party Appetizer
Crunchy Beef Cones are bite-sized party appetizers with a savory beef filling inside crispy cone shells, finished with melted cheese and fresh toppings.
- Total Time: 30 mins
- Yield: 24 cones
Ingredients
- 12 wonton wrappers
- 1 lb ground beef (85% lean)
- 1/2 cup onion, finely chopped
- 2 cloves garlic, minced
- 1/2 cup red bell pepper, finely diced
- 1/2 cup cheddar cheese, shredded
- 2 tbsp tomato sauce
- 1 tsp chili powder
- 1/2 tsp ground cumin
- Salt and pepper to taste
- Oil spray or neutral oil for baking
- Optional toppings: sour cream, diced tomato, green onions, cilantro
Instructions
- Preheat oven to 400°F (200°C). Lightly oil a muffin tin or cone molds.
- Shape 12 wonton wrappers into cone forms and nest them in the muffin tin.
- In a skillet, cook the ground beef with onion, garlic, bell pepper, chili powder, cumin, salt, and pepper until browned. Stir in tomato sauce.
- Spoon beef mixture into each cone and top with shredded cheddar cheese.
- Bake 12–15 minutes until cones are crisp and cheese is melted. Remove carefully and let cool slightly.
- Garnish with optional toppings and serve warm.
Notes
- If you don’t have cone molds, shape wonton wrappers into cones using foil and bake on a muffin tin. <liMake-ahead: cook the beef filling and refrigerate; fill cones just before serving to keep them extra crispy. <liTo keep the cones healthier, use turkey or lean beef and add extra veggies.
- Prep Time: 15 mins
- Cook Time: 15 mins
- Method: Baking
- Cuisine: Tex-Mex-inspired
- Diet: Non-Vegetarian, Contains Dairy, Contains Gluten
Nutrition
- Serving Size: 2 cones
- Calories: 260 Kcal
- Sugar: 3 g
- Sodium: 450 mg
- Fat: 18 g
- Saturated Fat: 7 g
- Unsaturated Fat: 11 g
- Trans Fat: 0 g
- Carbohydrates: 12 g
- Fiber: 1 g
- Protein: 18 g
- Cholesterol: 70 mg