
🍛 Crispy Chicken Katsu Curry That Beats Takeout 🍗
1. Introduction
There is something magical about crispy chicken katsu curry: a crackly crust, juicy chicken, and a velvety curry that coats your rice in warmth. This version brings the comfort of japanese curry into your own kitchen with homemade katsu curry that rivals takeout. The aroma of seared onion, garlic, and curry roux fills the air as you plate, making weeknights feel like a cozy restaurant experience.
2. Why You’ll Love This Recipe
- Ready in about 40 minutes, perfect for busy evenings.
- Crispy, juicy chicken with a luxurious, spoonable curry sauce.
- Homemade flavor that outshines most takeout options.
- Great for meal prep and lunch leftovers, reheated without losing crisp.
3. Ingredient Notes
Choose boneless, skinless chicken thighs for the juiciest, most forgiving results; they stay moist under a crisp breading. Use light or neutral oil for frying and take care not to overcrowd the pan so the crust stays extra crispy. For the curry, classic Japanese curry roux blocks are recommended; you can tailor the heat by adjusting the curry roux variety and adding a splash of chili paste if you like it spicy.
Quality matters here: crispy texture comes from a crisp breading, so opt for panko breadcrumbs and a thin coating of flour and beaten egg to help the crust cling. If you’re avoiding gluten, substitute with gluten-free flour and a gluten-free curry roux; the finish will still be deeply aromatic. For a lighter finish, you can air-fry the breaded chicken to reduce oil while preserving a crackly crust.
Rice is the perfect canvas. Rinse the rice until the water runs clear for fluffiness, then steam until tender. If you’d like a touch of brightness, a quick squeeze of lime over the finished dish adds a modern contrast to the rich curry.
Internal reads for fans of comforting sweets and quick bites: peanut butter oat cups no-bake treat, healthy chocolate muffins, creamy tomato garlic pasta ready in 30 minutes.
4. Kitchen Tools You Need
To get restaurant-style crisp without deep frying, an air fryer is a game-changer. It gives you that crackly crust with a fraction of the oil, keeping your chicken light and crisp even after resting. Compact 6-in-1 Digital Air Fryer makes this easy and efficient.
A sturdy nonstick skillet helps you achieve an even golden crust without sticking. For a reliable upgrade, try T-fal 14-Piece Hard Anodized Nonstick Cookware Set, which cleans up easily and distributes heat evenly.
When you’re ready to level up, the Ninja Foodi Smart XL Indoor Grill & Air Fryer Combo doubles as a grill and air fryer, giving you flexibility for future dinners.
If you love baking or want a kitchen workhorse, the KitchenAid Artisan 5-Quart Stand Mixer is a dream for prep work and can handle batter, dough, and more with ease.
Another versatile option is the Ninja Air Fryer Pro Crisp & Roast 4-in-1, ideal for getting extra-crisp coatings on poultry or vegetables with minimal oil.
5. How to Make Crispy Chicken Katsu Curry That Beats Takeout
Phase 1 — Prep the chicken
Pat the chicken dry, then season lightly with salt. This helps the crust adhere and keeps the meat juicy. Set up a breading station with flour, beaten eggs, and panko so you can glaze the chicken quickly without fuss.
Phase 2 — Bread the chicken
Dust the chicken in flour, dip in egg, then press into panko until fully coated. The goal is a light, even crust that puffs up when it hits heat. Let the breaded pieces rest for a minute so the coating sticks before cooking.
Phase 3 — Cook the chicken
Cook until the crust is golden and the inside reads 165°F (74°C). If you’re using an air fryer, place the pieces in a single layer and flip halfway for even crispness. You want a crust that crackles at the first bite and a juicy center.
Phase 4 — Make the curry sauce
Sauté onions (and optional garlic) until they’re deeply translucent and sweet. Stir in curry roux and broth, simmering until the sauce thickens to a creamy, glossy consistency. The aroma should be warm, comforting, with hints of apple and spice.
Phase 5 — Plate and finish
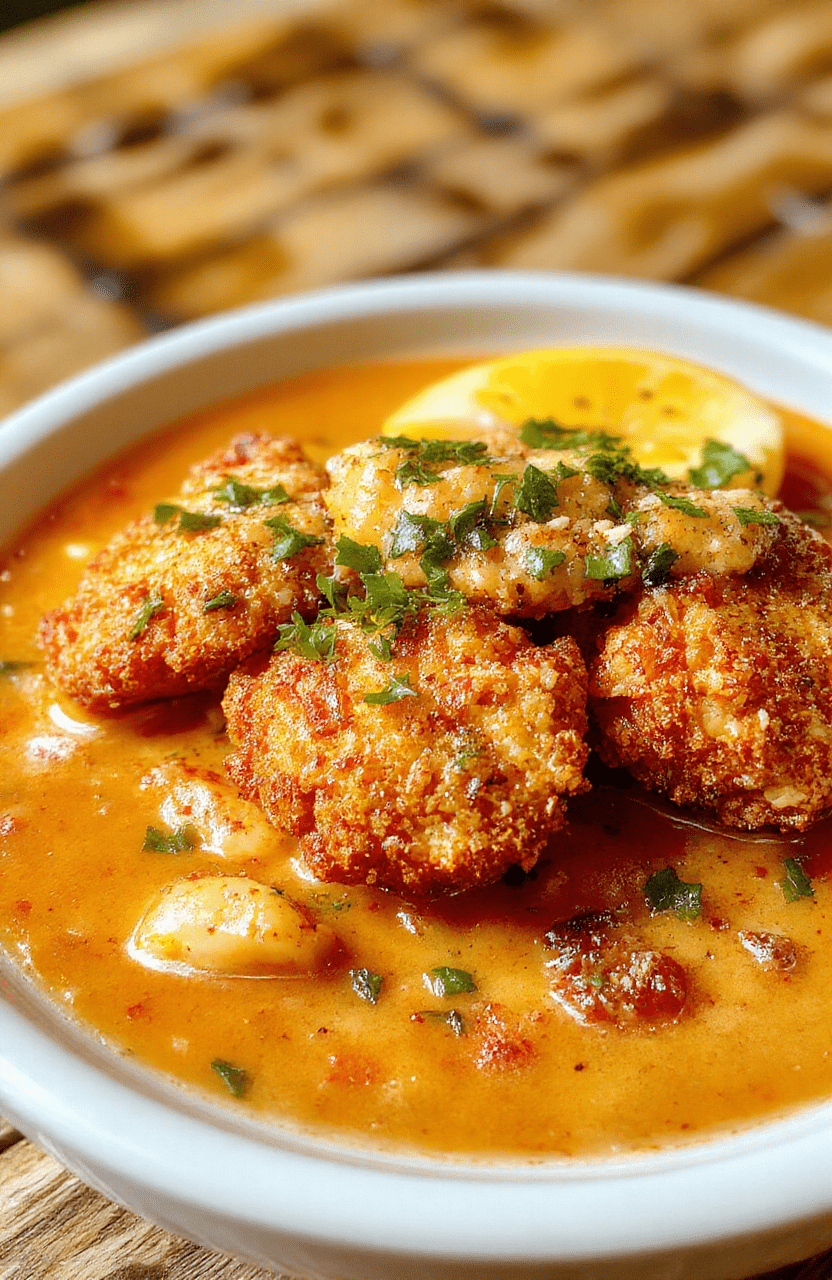
Slice the crispy chicken and lay it over steamed rice. Ladle the curry sauce generously, letting it pool around the edges for a luscious presentation. A quick sprinkle of pickled ginger or chopped scallions adds crisp contrast and brightness.
6. Expert Tips for Success
Dry the chicken thoroughly before breading to maximize crust adhesion and crispiness. Keep the oil at a steady medium-high temperature so the crust browns quickly without absorbing excess oil. Use light, fluffy panko for the crunchiest finish, and avoid overcrowding the pan or air fryer basket to prevent soggy crust.
Rest the breaded chicken for a minute before cooking; this helps the coating set so it stays intact during frying or air frying. If your curry seems too thick, whisk in a splash of stock or water to loosen it; if it’s too thin, simmer a few minutes longer for a silkier texture. Taste the curry at the end and adjust salt and a touch of sugar or soy sauce to balance sweetness and savoriness.
7. Variations & Substitutions
Swap chicken thighs for breasts if you prefer leaner meat, but note breasts can dry out faster without careful timing. For a gluten-free version, use gluten-free breadcrumbs and curry roux labeled gluten-free. You can make this dish with tofu or tempeh for a vegetarian option, breading them and air-frying until crisp.
Turn the dish into pork katsu curry by using pork cutlets instead of chicken. For spice lovers, add a small amount of chili paste to the curry sauce or swap to a hotter curry roux. If you’re avoiding dairy, use dairy-free stock and check that the curry roux is dairy-free as well.
To keep things bright, finish with a squeeze of lemon or a drizzle of sesame oil, and pair with sliced cucumbers for a refreshing crunch.
8. Storage & Reheating
Store leftover curry sauce and breaded chicken separately in airtight containers for up to 3 days. Reheat the chicken in a hot oven or air fryer to revive the crisp, then re-warm the curry sauce on the stove. Reheating the sauce slowly preserves its velvet texture without breaking the flavors.
9. FAQ
Q: What is crispy chicken katsu curry? A: It’s a Japanese-style dish featuring breaded, fried or air-fried chicken served with a rich, mild curry sauce and rice. The crisp coating contrasts beautifully with the creamy curry.
Q: Can I fry or air fry the chicken? A: Yes. Air frying produces a lighter crust with crisper results, while shallow or deep frying gives an ultra-traditional, extra-crispy finish. Adjust the heat to prevent burning and ensure the chicken reaches 165°F in the center.
Q: How do you thicken the curry? A: Simmer the curry sauce longer to reduce it, or whisk in a small amount of cornstarch slurry (mixed with cold water) to achieve a glossy, thick sauce.
Q: Which curry roux is best? A: Look for a smooth, fragrant roux with balanced spices. Start with a mild to medium heat and adjust with hot sauce or chili paste if you like it hotter.
10. Conclusion
This Crispy Chicken Katsu Curry That Beats Takeout brings restaurant-quality flavors into your home with a simple, cozy routine. The crisp chicken, velvety curry, and fluffy rice create a comforting plate that satisfies every craving. For more reader-approved recipes and kitchen inspiration, explore our popular picks and pantry classics to keep your weeknight menu exciting.
Print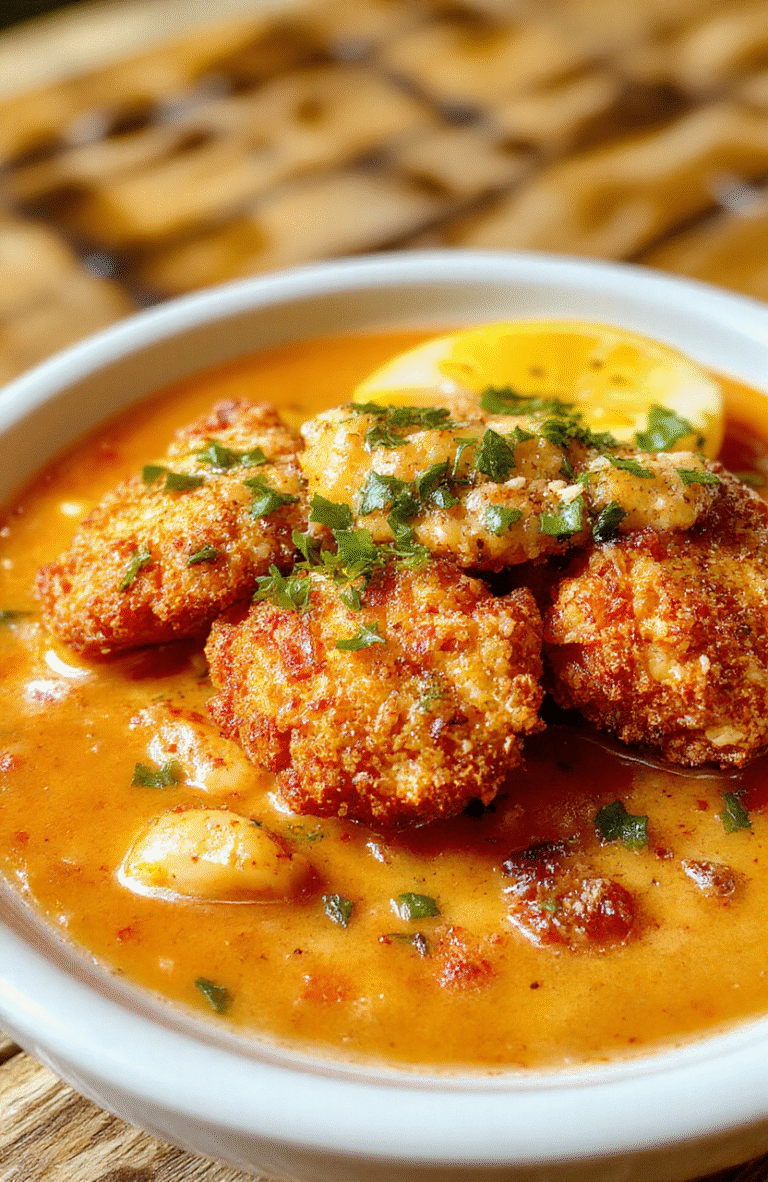
Crispy Chicken Katsu Curry That Beats Takeout
Crispy chicken katsu with a hearty Japanese curry served over rice; a weeknight favorite that’s crisp on the outside, tender inside, and simmered in a savory curry.
- Total Time: 45 mins
- Yield: 4 servings
Ingredients
- 2 boneless skinless chicken breasts, pounded to even thickness
- Salt and pepper
- 1/2 cup all-purpose flour
- 2 large eggs, beaten
- 1 cup panko breadcrumbs
- 2 tablespoons neutral oil, plus more for frying
- 2 cups cooked white rice, for serving
- 1 tablespoon vegetable oil
- 1 medium onion, thinly sliced
- 2 cloves garlic, minced
- 1 tablespoon grated ginger
- 2 cups chicken stock
- 2 tablespoons curry powder (or to taste)
- 1 tablespoon all-purpose flour
- 1 tablespoon soy sauce
- 1 teaspoon sugar
- 1 carrot, diced
- 1 potato, diced (optional)
- Sesame seeds and sliced scallions, for garnish
Instructions
- Season chicken with salt and pepper. Dredge in flour, dip in eggs, then coat with panko.
- Pan-fry in oil over medium-high heat until golden and cooked through. Drain and slice into strips.
- In a separate pan, sauté onion, garlic, and ginger in oil until translucent. Add carrot and potato, then stir in curry powder and flour.
- Whisk in chicken stock gradually; simmer until thick and glossy. Stir in soy sauce and sugar to balance sweetness.
- Serve the sliced chicken over rice and ladle plenty of curry sauce on top. Garnish with sesame seeds and scallions.
Notes
- For extra crispiness, double-dip the chicken in flour, egg, then panko.
- To bake instead of fry, air-fry breaded chicken at 400F for 10-12 minutes until crisp.
- Store curry sauce separately and reheat gently for leftovers.
- Smart swap: use store-bought Japanese curry roux for a richer, faster sauce.
- Prep Time: 20 mins
- Cook Time: 25 mins
- Method: Pan-fry and simmer
- Cuisine: Japanese-inspired
- Diet: Contains gluten
Nutrition
- Serving Size: 1 plate (approx 480 g)
- Calories: 700 Kcal
- Sugar: 9 g
- Sodium: 980 mg
- Fat: 28 g
- Saturated Fat: 6 g
- Unsaturated Fat: 18 g
- Trans Fat: 0 g
- Carbohydrates: 88 g
- Fiber: 4 g
- Protein: 38 g
- Cholesterol: 180 mg