
🔥 Crispy, Glazed, & Ready in 20 Minutes: Savory Teriyaki Chicken Stir Fry
1. Introduction
There’s something deeply satisfying about the smell of garlic and ginger sizzling in a hot wok, mingling with the sweet-salty tang of homemade teriyaki glaze clinging to tender chicken and crisp-tender vegetables. This quick teriyaki chicken dinner is your weeknight savior—rich in umami, naturally glossy, and bursting with restaurant-quality flavor without the takeout wait. I’ve tested this recipe during chaotic school nights and lazy Sunday evenings alike, and it never fails to deliver: juicy chicken, vibrant veggies, and a sauce that coats every bite with balanced sweetness and depth. Whether you’re meal prepping for the week or pulling off an impromptu dinner guest surprise, this easy teriyaki chicken dish proves speed and flavor go hand-in-hand.
2. Why You’ll Love This Recipe
- Ready in under 20 minutes—perfect for those “I’m starving and it’s 6:45 PM” moments
- One-pan wonder—minimal cleanup and maximum flavor development
- Restaurant-level sauce made entirely from pantry staples (no store-bought bottles needed)
- Customizable veggie base—use what you have or your kids will eat
- Meal-prep friendly—tastes even better the next day as leftovers
3. Ingredient Notes
A truly great teriyaki chicken stir fry starts with intentionality—not just grabbing whatever’s in the cupboard. Here’s why each ingredient matters:
- Chicken thighs (boneless, skinless): I prefer thighs over breasts here—not only are they more forgiving (less prone to drying out), but their richer flavor stands up beautifully to the bold teriyaki glaze. Cut them into uniform 1-inch cubes for even cooking.
- Low-sodium soy sauce: This gives you control over saltiness while preserving that deep savory base. If you only have regular soy, reduce quantity by 25%.
- Honey + brown sugar: The honey adds floral brightness, while brown sugar lend chewy depth and helps create that desirable glossy “high shine” finish. Brown sugar also balances acidity better than white sugar in this application.
- Fresh ginger + garlic: Neversubstitute with powdered here. Grated fresh ginger gives bright citrusy heat, while garlic contributes pungent savoriness—both mellow beautifully when stir-fried in oil.
- Cornstarch slurry: This is the secret to emulsifying the sauce and helping it cling like silk. Mix *after* dissolving in cold water to avoid lumps.
- Veggie upgrades: Bell peppers (red/yellow for color and sweetness), snap peas (crunch factor), broccoli florets (earthy bite), and thinly sliced carrots (slight crunch) work beautifully. I always add a splash of sesame oil at the end—it’s the final aromatic whisper that lifts the whole dish.
4. Kitchen Tools You Need
While this recipe works in any fry pan, certain tools will elevate both your efficiency and results:
- Ninja Air Fryer Pro Crisp & Roast 4-in-1: Great for pre-cooking chicken thighs if you want extra-crispy edges without excess oil. Use the roast setting at 400°F for 8–10 minutes, then finish in the skillet with veggies and sauce.
- T-fal 14-Piece Hard Anodized Nonstick Cookware Set: A deep, wide skillet is essential for stir-frying. This set includes one with a generous 12″ diameter and excellent heat distribution—ideal for achieving that perfect sear before deglazing.
- Deluxe 33-Piece Silicone Utensil Set: Non-scratch silicone tools protect your cookware and won’t chip like wood or metal—perfect for scraping up those flavorful fond bits during deglazing.
- Fullstar Ultimate Veggie Prep Master: If you love prepping multiple vegetables at once, this smart mandoline saves serious time. Its adjustable slicing and julienne settings make quick work of bell peppers and carrots.
5. How to Make Savory Teriyaki Chicken Stir Fry
Phase 1: Prep & Marinate (5 minutes)
Start by whisking together the marinade: 2 tablespoons soy sauce, 1 tablespoon sesame oil, 1 teaspoon grated ginger, and 1 minced garlic clove. Toss chicken cubes in this mix and let sit for 10–15 minutes (or up to 30 minutes refrigerated). While that rests, prep veggies and make the sauce (next step).
Phase 2: Teriyaki Sauce (5 minutes)
In a small bowl, combine ¼ cup low-sodium soy sauce, 2 tablespoons water, 2 tablespoons honey, 1 tablespoon brown sugar, 1 teaspoon grated ginger, 1 minced garlic clove, and 1 Tablespoon cornstarch. Whisk until sugar dissolves—this will be your thickener and glaze base.
Phase 3: Sear the Chicken (4 minutes)
Heat 1 Tablespoon oil in a large skillet or wok over medium-high until shimmering. Add chicken in a single layer (work in batches if needed) and sear undisturbed for 2 minutes per side until golden brown. Don’t overcrowd the pan—that steam is the enemy of browning! Once golden, transfer chicken to a plate.
Phase 4: Sauté Veggies (3–4 minutes)
In the same skillet, add a touch more oil if dry, then toss in firmer veggies first—hearty broccoli or carrots sauté for 2 minutes. Follow with softer veggies like bell peppers and snap peas, cooking just until bright and tender-crisp (about 1–2 minutes). If using mushrooms or onions, add them with the carrots.
Phase 5: Glaze & Combine (2 minutes)
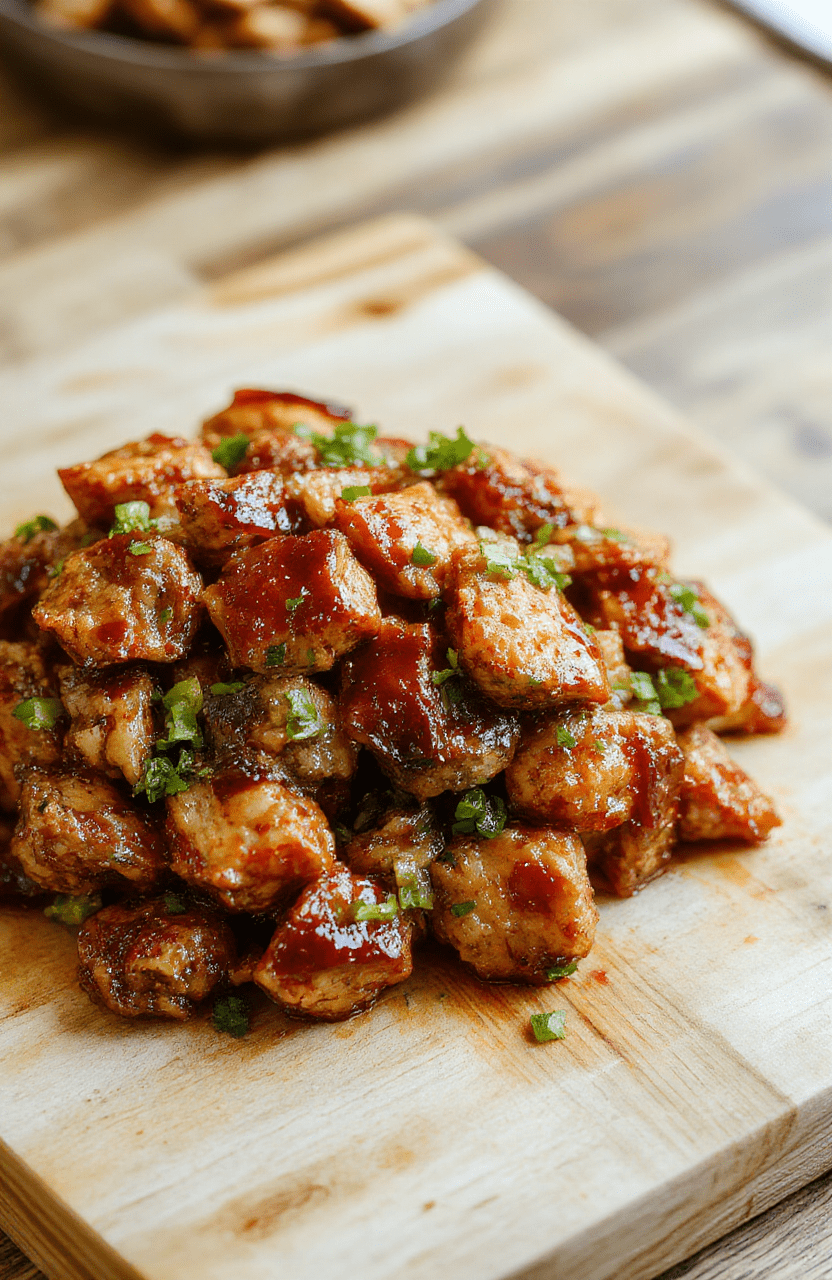
Return chicken to the pan. Pour sauce over everything and bring to a gentle simmer. Stir constantly—you’ll see it thicken and become glossy within 60 seconds. The sauce should coat the back of a spoon but remain fluid enough to drape over rice. Turn off heat and drizzle with ½ teaspoon toasted sesame oil for aroma. Taste and adjust: a squeeze of lime or extra honey? Done.
6. Expert Tips for Success
From many failed batches, I’ve learned hard truths—share them to save you time:
- Don’t boil the sauce: Once it thickens, remove from heat immediately. Overcooking breaks down the cornstarch and makes sauce grainy.
- Pat chicken dry before marinating: Wet meat steams instead of searing—no amount of heat will save soggy chicken.
- Chop veggies uniformly: Uneven pieces mean some are mushy while others are raw.
- Temper the sauce: If your wok is *very* hot, deglaze with 1 tablespoon cold water *first* before adding sauce to prevent premature thickening on contact.
- Finish with a pinch of flake salt: It balances sweetness and enhances all the savory notes.
7. Variations & Substitutions
- Gluten-free: Swap soy sauce for tamari or coconut aminos.
- Low-sugar: Replace honey with monk fruit sweetener and skip brown sugar—use 2 Tablespoons erythritol or allulose instead.
- Protein swaps: Use cubed firm tofu (press first for better texture), shrimp, or thinly sliced beef strips (cook quickly—30 seconds per side).
- Spicy kick: Add ½ teaspoon red pepper flakes with garlic or a dash of sriracha in the sauce.
- Keto-friendly: Use allulose or monk fruit blend, reduce honey to 1 tbsp, and serve over cauliflower rice with extra broccoli and mushrooms.
8. Storage & Reheating
Store in an airtight container in the fridge for up to 4 days. Reheat in a skillet over medium heat with 1 teaspoon water to revive sauce texture (microwaving alone makes it rubbery). For best results, keep sauce separate from chicken/veggies if prepping ahead—combine just before serving. Leftovers freeze well for up to 2 months. Thaw overnight in fridge before reheating.
9. FAQ
Q: Can I use frozen chicken?
A: Yes—but thaw first. Cooking frozen chicken directly changes the texture and risks undercooking. You can Quick-Thaw by placing sealed bag in cold water for 30 minutes.
Q: Why does my teriyaki sauce sometimes turn grainy?
A>Sugar crystals can form if not fully dissolved before cooking. Always use warm liquid to dissolve honey/sugar first, and avoid overheating once thickened.
Q: My sauce didn’t thicken—what went wrong?
A>Most likely the cornstarch wasn’t mixed properly (lumps!) or the sauce never reached a simmer. Ensure it comes to a gentle boil for 30–60 seconds to activate the starch.
Q: What rice pairs best with this dish?
A>Short-grain white or brown rice, but jasmine rice adds floral notes. For extra authenticity, try short-grain sushi rice or even sticky glutinous rice if available.
10. Conclusion
This 20-minute teriyaki chicken dish packs all the cozy comfort of your favorite Japanese-American staple—minus the sodium overload, artificial thickeners, and delivery fee. With a few smart prep choices and the right sauce balance, you can replicate the restaurant experience right in your kitchen. Pair it with a crisp salad, a bowl of steamed rice, or enjoy it solo while watching your favorite show. And if you’re looking for more weeknight wins, explore our Sweet & Spicy Honey Pepper Chicken or the fan-favorite Easy Buffalo Chicken Sliders. Ready to cook? Let me know how yours turns out in the comments!
Print
Savory Teriyaki Chicken Stir Fry
A fast, flavorful weeknight hero: tender chicken in a homemade teriyaki glaze, served with rice and veggies.
- Total Time: 20 minutes
- Yield: 4 servings
Ingredients
- 1 lb boneless, skinless chicken thighs, sliced into strips
- 2 tbsp avocado oil
- 1 cup cooked white rice, for serving
- 1 cup steamed broccoli florets
- 1 tbsp sesame seeds, toasted
- 2 green onions, sliced
- Teriyaki Sauce:
- 3 tbsp soy sauce (low-sodium)
- 2 tbsp mirin
- 1 tbsp brown sugar
- 1 tsp sesame oil
- 1 garlic clove, minced
- 1 tsp fresh ginger, grated
- 1 tsp cornstarch
- 2 tbsp water
Instructions
- In a small bowl, whisk together soy sauce, mirin, brown sugar, sesame oil, garlic, ginger, cornstarch, and water; set aside.
- Heat 1 tbsp oil in a large skillet over medium-high heat. Add chicken and cook 5–6 minutes until golden and cooked through. Remove chicken.
- Add remaining oil, then pour in sauce. Bring to a simmer and cook 2 minutes until thickened.
- Return chicken to skillet, toss to coat. Serve over rice with broccoli, sesame seeds, and green onions.
Notes
- For gluten-free, use tamari instead of soy sauce.
- Swap broccoli with bok choy or snap peas for variation.
- Double the sauce if you prefer extra dribble-able goodness!
- Prep Time: 10 minutes
- Cook Time: 10 minutes
- Method: Stir-fry
- Cuisine: Japanese-inspired
- Diet: High Protein
Nutrition
- Serving Size: 1 serving
- Calories: 345 Kcal
- Sugar: 9 g
- Sodium: 620 mg
- Fat: 12 g
- Saturated Fat: 3 g
- Unsaturated Fat: 7 g
- Trans Fat: 0 g
- Carbohydrates: 28 g
- Fiber: 2 g
- Protein: 32 g
- Cholesterol: 90 mg