

🍯 Crispy Honey Butter Chicken with Milky Garlic Rice – A 30-Minute Weeknight Win!
1. Introduction
There’s something deeply comforting about honey butter chicken — golden pan-seared chicken thighs glazed in a rich, glossy sauce that balances sweet, savory, and just a hint of garlicky depth. Paired with creamy, parsley-speckled garlic rice, this dish is pure comfort on a plate — and it’s ready faster than takeout. I’ve tested dozens of versions (mostly while convincing my kids that “more syrupy glaze = better dinner”), and this one hits all the right notes: crisp edges, juicy interior, and that craveable Stick-to-Your-Spoon sauce. Whether you’re rushing home from work or entertaining last-minute guests, this quick chicken dinner delivers restaurant-level flavor with zero hassle.
2. Why You’ll Love This Recipe
- Ready in under 30 minutes — ideal for busy weeknights or unexpected dinner plans.
- One-pan cooking (minus the rice pot!) for easy cleanup and deep flavor buildup.
- Minimal pantry staples — you likely already have honey, soy sauce, garlic, and butter on hand.
- kid-approved & date-night ready — swap the rice for roasted veggies or serve with crusty bread depending on the occasion.
- Versatile base — go spicy with red pepper flakes, add a splash of lime for brightness, or roast the chicken after glazing for extra texture.
3. Ingredient Notes
Quality makes all the difference here — especially when you’re working with just a handful of ingredients. Let’s break it down:
Chicken thighs (boneless, skin-on): They’re more forgiving than breasts (no dry, rubbery surprises!) and the skin crisps up beautifully in the pan. If you only have bone-in, increase simmer time by 10–12 minutes. For leaner results, use breasts but don’t overcook — Internal temp should hit 165°F.
Unsalted butter: Gives that luscious body to the glaze. I always use European-style (like Plugrá) for its higher fat content — it emulsifies better and tastes richer. *Pro tip:* Chill the butter briefly before adding to the sauce to prevent curdling.
Fresh garlic & ginger: Jarred garlic works in a pinch, but fresh minced garlic adds bright, floral notes that roasted garlic can’t match. grate 1/2-inch piece of ginger for subtle warmth (optional but highly recommended).
Raw honey: Not “honey-flavored syrup” — seek out local raw honey. Its floral complexity balances the soy sauce’s saltiness and adds depth the refined stuff lacks. If unavailable, grade A amber honey is fine.
Chicken broth & soy sauce (or tamari for GF): Use low-sodium broth to control salt levels. For soy sauce, I prefer Japanese usukuchi for its lighter color and cleaner taste — but standard tamari or Shoyu works.
Unsalted rice: Short- or medium-grain white rice (like Calrose) absorbs the garlic butter sauce best. Rinse until water runs clear — this prevents gumminess and ensures fluffy, separate grains.
👉 Lovin’ this honey glaze? Pair it with my Sweet & Spicy Honey Pepper Chicken for a flavor double-header!
4. Kitchen Tools You Need
You don’t need fancy gear — but the right tools *do* make cooking more consistent and less frustrating. Here’s what elevates this recipe:
A heavy-bottomed skillet (12-inch stainless or clad): Heat distribution is everything for crispy chicken without hot spots. My go-to is the T-fal 14-Piece Hard Anodized Nonstick Cookware Set — the skillet’s flat, warp-resistant base sears like a champ, and the reinforced nonstick涂层 handles garlic butter like a dream.
Instant-read thermometer: Avoid dry chicken. The Ninja Air Fryer Pro Crisp & Roast 4-in-1’s thermometer (or a standalone probe like ThermoWorks) ensures perfect doneness every time.
Microplane zester: Grate garlic, ginger, or lemon zest finely for even flavor distribution — no big, pungent chunks burning in the pan. My favorite: full-sized Microplane — it’s cheap, effective, and durable.
Small saucepan: For toasting rice in butter before adding broth — a simple step that adds nutty depth to the garlic rice.
Lovin’ smart kitchen prep? The Fullstar Ultimate Veggie Prep Master zests garlic in seconds — saves elbow grease and tears!
5. How to Make Honey Butter Chicken with Garlic Rice
Phase 1: Prep & Pat Dry
Pat chicken thighs bone-dry with paper towels — moisture is the enemy of crispiness. Season generously with salt and pepper on both sides. Mince 4 garlic cloves + grate 1/2-inch ginger (if using). Whisk sauce ingredients (3 tbsp honey, 2 tbsp soy sauce, 1 tbsp rice vinegar, 1/2 cup broth, 1 tsp cornstarch) in a small bowl — set aside.
Phase 2: Sear Like a Pro
Heat 1 tbsp neutral oil (avocado or grapeseed) over medium-high in a 12″ skillet until shimmering. Add chicken skin-side down. Press gently with a spatula for 4–5 minutes until deep golden and crispy. Flip, cook 3–4 minutes more until mostly done (internal temp ~155°F). Remove chicken, tent loosely with foil.
Phase 3: Build the Glaze
Reduce heat to medium. Melt 4 tbsp butter, then add garlic and ginger. Sizzle 30 seconds until fragrant (don’t let it brown!). Reduce heat to low if it smells bitter. Pour in sauce mixture — it’ll bubble violently at first. Stir constantly until thickened (1–2 minutes), about the consistency of warm maple syrup.
Phase 4: Glaze & Bake (Optional, but Dreamy)
Return chicken to skillet, coating both sides. For extra caramelization, transfer skillet to a 400°F oven for 4–5 minutes until sauce bubbles and sticks. Or, use a blowtorch for “artisan” shine (I keep mine in my camping kit!).
Phase 5: Garlic Rice — 10-Minute Magic
While chicken rests, toast 1 cup rinsed rice in a saucepan with 2 tbsp butter (and 2 minced garlic cloves, if desired) over medium heat for 2 minutes — stir constantly until rice smells nutty and edges turn translucent. Add 1 3/4 cups broth, bring to boil, cover, reduce heat to low, and simmer for 12 minutes. Let rest 5 minutes, then fluff with fork and stir in 2 tbsp chopped parsley.
6. Expert Tips for Success
- Crisp skin secret: Pat chicken *twice* — once before seasoning, once after. Cold chicken + dry skin = better sear.
- Glaze science: Cornstarch must hit a boil to deactivate raw taste. If sauce splits, whisk in 1 tsp hot broth until smooth.
- Rice texture hack: Toasting rice before adding liquid builds a deeper, rice-nutty flavor and prevents mushiness.
- Don’t skip resting: Let chicken rest 5 minutes after glazing — juices redistribute, so every bite stays juicy.
- Acidity balance: If sauce tastes one-note, add a *drop* more honey or 1/4 tsp lemon juice — it brightens and rounds things out.
7. Variations & Substitutions
Spicy Honey Chicken: Add 1/2 tsp red pepper flakes to sauce, or 1 tbsp gochujang for Korean-inspired depth.
Sugar-Free / Keto: Swap honey for monk fruit blend + 1 tsp molasses (for depth). Use cauliflower rice (sauté with garlic butter like regular rice).
Sheet Pan Dinners: Roast chicken and broccoli florets together at 400°F for 20 minutes. Simmer sauce separately, then drizzle over.
Dairy-Free: Use vegan butter (like Miyoko’s) and coconut aminos instead of soy sauce.
One-Pot Hack: Sear chicken, remove. Sauté 1 cup sliced mushrooms + 1/2 cup sliced bell peppers in residual fat. Add broth, rice, and cook as directed — stir in chicken at the end.
8. Storage & Reheating
Cold vs. Room Temp: Store separately — chicken and sauce (up to 4 days), rice (3–4 days) — to preserve texture. Cold honey butter Chicken reheats beautifully in the air fryer.
Reheating Chicken: Air fry at 350°F for 6–8 minutes until heated through and skin re-crisps. Avoid microwave — it turns skin rubbery.
Reheating Garlic Rice: Sprinkle with 1 tbsp water, cover, and microwave 45–60 seconds. For stovetop: heat 1 tsp butter in pan, add rice, stir over low heat until steaming.
Freezing: Freeze sauce and chicken (boneless, no skin) separately for up to 3 months. Thaw overnight in fridge. Reheat gently — reheating twice risks dryness.
Love meal prepping? Try my Dump-and-Go Smothered Pork Chops for a freezer-friendly counterpart!
9. FAQ
Q: Can I use chicken breast instead of thighs?
A: Yes — but be strict with timing. Slice breasts in half horizontally for even thickness. Sear 4 mins per side, then finish in 400°F oven for 5–7 minutes (target 160°F rest temp). Cover with foil to trap steam.
Q: My sauce turned grainy — what went wrong?
A: Cornstarch clumps when added directly to cold liquid or overheated. Always mix cornstarch with *cold* liquid first (a “slurry”) and simmer 1–2 minutes fully to activate thickening.
Q: How do I prevent chicken from sticking to the pan?
A: Heat the pan *and* oil fully before adding chicken. Don’t move it for the first 3 minutes — it will release naturally once seared. Use a well-seasoned or/clad pan (stainless works best).
Q: Can I make this in an air fryer?
A: Partially — I use a Compact 6-in-1 Digital Air Fryer by Amazon Basics for the chicken: cook thighs at 380°F for 12 mins, flip, glaze, then air fry 2 more mins. For rice, stick to the stovetop — air fryers aren’t designed for simmering rice.
10. Conclusion
This honey butter chicken recipe is my weeknight rescue — it’s fast, fancy, and foolproof. The glossy glaze clings like candy, the garlic rice soaks it up like a dream, and even picky eaters clean their plates. Grab a spoon, drizzle extra sauce, and savor that first bite — you’ve earned it.
Tag a friend who needs this dinner in their life — and don’t forget to save my Easy Buffalo Chicken Sliders for game day!
Print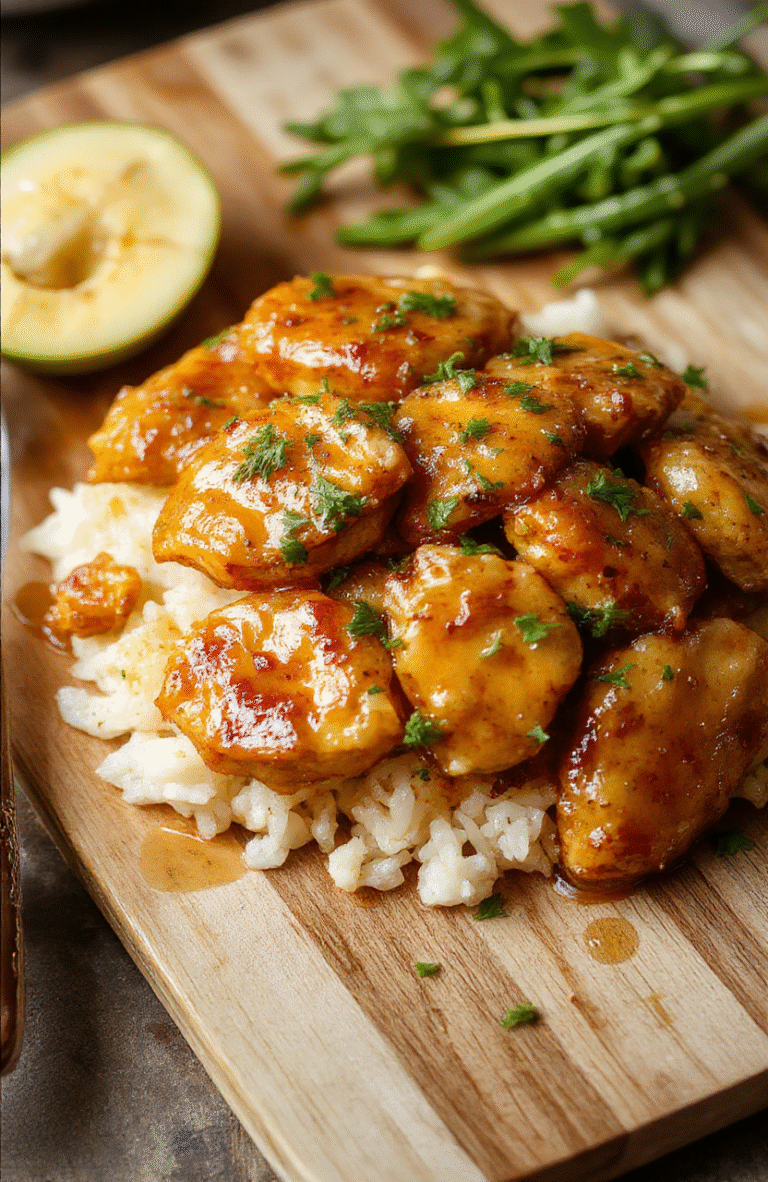
Honey Butter Chicken with Garlic Rice
This quick honey butter chicken features juicy chicken thighs glazed in a rich honey-butter-garlic sauce and served over fluffy garlic rice. Ready in under 30 minutes and packed with flavor.
- Total Time: 25 minutes
- Yield: 4 servings
Ingredients
- 2 boneless, skinless chicken thighs (about 1 lb), cut into bite-sized pieces
- 2 tbsp olive oil
- 3 cloves garlic, minced
- 2 tbsp honey
- 2 tbsp unsalted butter
- 1 tbsp soy sauce (or tamari for GF)
- 1 tsp lemon juice
- ¼ tsp black pepper
- 2 cups cooked white rice
- 1 tbsp sesame seeds, toasted (optional)
- Fresh parsley, chopped for garnish
Instructions
- Season chicken pieces with salt and pepper.
- Heat olive oil in a large skillet over medium-high heat. Add chicken and cook 5–6 minutes until golden brown. Remove chicken and set aside.
- In the same skillet, add garlic and sauté 30 seconds until fragrant.
- Stir in honey, butter, soy sauce, and lemon juice. Simmer 1–2 minutes until sauce thickens slightly.
- Return chicken to the skillet, toss to coat in sauce, and cook 1 minute until fully absorbed.
- Serve over garlic rice, topped with sesame seeds and parsley.
Notes
- For extra crispness, flatten chicken pieces before cooking.
- Sugar-free honey can be used for a lower-glycemic option.
- Pair with steamed broccoli or green beans for added veggies.
- Prep Time: 10 minutes
- Cook Time: 15 minutes
- Method: Stovetop
- Cuisine: American
- Diet: High Protein
Nutrition
- Serving Size: 1 chicken serving + ½ cup rice
- Calories: 342 Kcal
- Sugar: 14 g
- Sodium: 328 mg
- Fat: 12 g
- Saturated Fat: 5 g
- Unsaturated Fat: 6 g
- Trans Fat: 0 g
- Carbohydrates: 35 g
- Fiber: 1 g
- Protein: 24 g
- Cholesterol: 78 mg