
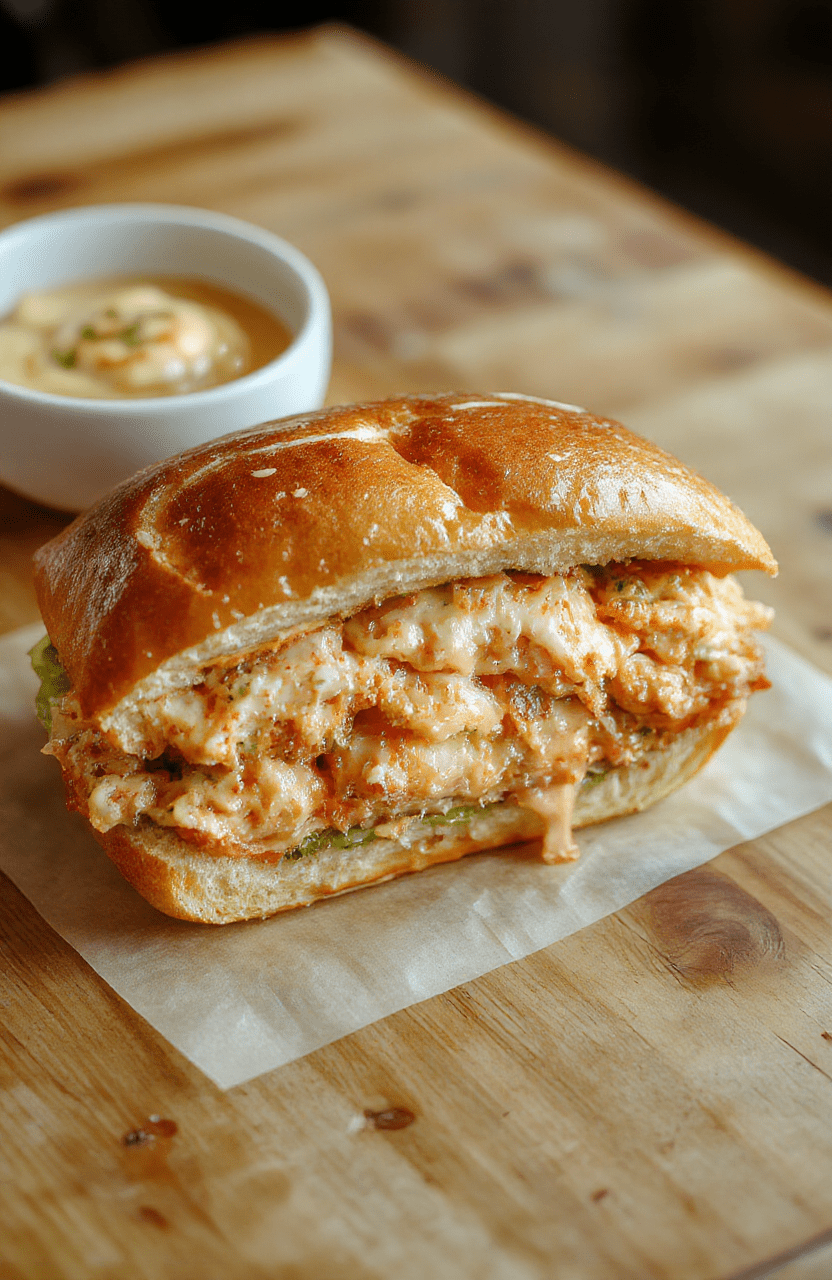
✨ Fluffy Japanese Egg Sandwich (Tamago Sando) — Soft, Sweet, & Irresistibly Light
1. Introduction
Ever tasted a sandwich so light, so plush, that it literally melts in your mouth? That’s themagic of the Japanese egg sandwich—a beloved classic in Japan known locally as tamago sando. Unlike Western egg salads, this version uses a meticulously crafted, slightly sweet custard-like egg filling nestled between two slices of ultra-soft, pillowy shokupan (milk bread). The result? A breakfast sandwich that’s comforting, elegant, and deeply satisfying. Its subtle sweetness, creamy texture, and delicate golden hue make it a staple in Japanese bento boxes, cafe menus, and even high-end hotel buffets. If you’ve ever imagined a sandwich that feels like a hug on a plate—this is it.
2. Why You’ll Love This Recipe
- Ready in under 30 minutes—faster than typical Japanese recipes allow, thanks to a simplified yet authentic method.
- One-bowl egg filling—no messy double boilers or tempering needed.
- Minimal ingredients—pantry staples with just one specialty item (cornstarch) for that signature fluffiness.
- Perfect for meal prep—make the filling ahead and assemble fresh in the morning.
- Friendly to kid口味 and adult palettes alike—mildly sweet, creamy, and naturally savory with a touch of dashi.”
3. Ingredient Notes
Truth be told—the magic of a tamago sando hinges on quality and technique. Here’s how to get it right:
Shokupan (Japanese Milk Bread): This is non-negotiable for authenticity. Its tender crumb and velvety texture set the stage. If you can’t find pre-sliced shokupan (look for brands like Tokyo bread or Yamazaki at Asian grocers or online), use brioche or challah—but lightly toast them *just* enough to firm up the crust without drying them out. Avoid sourdough or rustic loaves—they’ll compete with the delicate egg.
Eggs & Sugar: Use large, fresh, cage-free eggs. The sugar isn’t just for sweetness; it helps retain moisture and contributes to the custard’s smooth, almost marshmallow-like texture when cooked gently.
Mayonnaise & Mustard: Japanese mayonnaise (Kewpie) adds richness and emulsifying power due to its higher yolk content and rice vinegar base. A dash of Japanese mustard (mild and sweet) or Dijon cuts through the richness without overpowering.
Heavy Cream & Butter: For that creamy mouthfeel, real heavy cream (not half-and-half) is essential. Unsalted butter adds depth—never skip this finishing step; it seals in moisture and gives the sandwich that glossy, restaurant-quality finish.
Salt & Dashima (Optional): A pinch of sea salt enhances the egg’s natural flavor, while a small strip of kombu (dashiilm) steeped in the mixture (then removed) adds subtle umami depth. If you don’t have dashiilm, a splash of reserved egg shell water (yes, really) works in Japan—but stick with salt if you’re short on time.
4. Kitchen Tools You Need
Here’s how investing in the right tools makes or breaks this recipe:
• Stand Mixer for Flawless Bread — If you’re dreaming of homemade shokupan or just want to ensure perfect yeast doughs, the KitchenAid Artisan 5-Quart Stand Mixer in Scorched Orange is a kitchen hero. Its powerful motor and dough hook handle sticky buns effortlessly, giving you that even, fine crumb every time.
• Fine-Mesh Sieve & Whisk — For ultra-smooth egg custard, strain the mixture *twice*—first through a wire mesh sieve, then after cooking, to eliminate any tiny lumps. A small, silicone whisk ensures gentle, bubble-free mixing.
• Nonstick Skillet or Saucepan — A T-fal 14-Piece Hard Anodized Nonstick Cookware Set offers the even heat distribution needed to cook the egg custard slowly and evenly—no hot spots, no scrambling. (Bonus: Dishwasher-safe and durable for years of breakfast triumphs.)
• Sandwich Press or Heavy Pan — To achieve that signature grilled, golden-brown crust, a sandwich press or a weighted skillet works wonders. Pressing gently while cooking melds the layers and compresses the filling just enough—not too much!
• Digital Scale — Precision matters. Weigh your bread slices to ensure uniform thickness; aim for ~25g per slice for the best texture-to-filling ratio.
• Airtight Storage Containers — Store leftovers (yes, if there are any!) in JoyJolt Airtight Glass Food Storage Sets to keep the sandwich fresh and prevent it from drying out in the fridge.
5. How to Make Fluffy Japanese Egg Sandwich
This method is inspired by traditional techniques—but streamlined for home cooks. Let’s break it down into three key phases:
Phase 1: Prep the Egg Custard (5 minutes)
In a medium bowl, whisk together 4 large eggs, 2 tbsp granulated sugar, 1 tbsp cornstarch, and a pinch of salt until completely smooth—no streaks. Add 2 tbsp Kewpie mayo and 1 tsp Japanese mustard (or Dijon). Whisk vigorously for 30 seconds to emulsify. Strain the mixture through a fine-mesh sieve into a saucepan.
Phase 2: Cook the Custard (8 minutes)
Place the saucepan over low-low heat. Add 2 tbsp heavy cream and 1 tbsp unsalted butter. Stir constantly with a silicone spatula, scraping the bottom and sides. After 3–4 minutes, the mixture will thicken and smell like scrambled eggs—but keep going! You’re aiming for a glossy, creamy, marshmallow-textured custard. It should hold a soft peak when lifted but still be pourable. Turn off heat, cover surface directly with plastic wrap (to prevent skin), and cool to room temperature (~20 minutes), then refrigerate for 10 minutes to chill slightly (but not fully set).
Phase 3: Assemble & Press (5 minutes)
Lightly trim the crusts off two slices of shokupan with a serrated knife. Spread 1–2 tbsp of cooled custard evenly on one slice—go right to the edges. Top with the second slice. Gently press down with your hand to compress slightly.
In a nonstick skillet over medium-low, melt a small pat of butter. Place the sandwich in the pan and cook for 2–2.5 minutes per side, until golden brown and crisp. Press down lightly with a spatula (or use a sandwich press for even browning). Let rest for 2 minutes—this allows the custard to set firm again. Slice diagonally for that classic café presentation, garnish with a tiny sprinkle of sesame seeds or flaky salt, and serve immediately.
6. Expert Tips for Success
• Low and slow is non-negotiable. High heat = scrambled eggs, not custard. Keep the flame at its lowest setting.
• The “no-skin” trick: Covering the custard with plastic *tucked against the surface* prevents a skin from forming—a common cause of graininess.
• Chill but don’t freeze. If the custard sets too much in the fridge, let it sit at room temperature for 5 minutes and re-whisk gently before assembling.
• Use the skin. Don’t toss those crusts! Toast them in the air fryer with a bit of butter and cinnamon for a sweet, crunchy snack (like one-pot comfort food—but dessert-style).
• Test for doneness: When you lift the spatula, the custard should coat it like thin custard—not thick paste. It firms up as it cools.
7. Variations & Substitutions
Vegetarian Dashibean: For a deeper umami, steep a 2-inch piece of kombu in the cream for 10 minutes before adding to the custard. Remove before cooking.
Vegan Tamago Sando: Use tofu-based “egg” (silken tofu + nutritional yeast + turmeric + kala namak), arrowroot instead of cornstarch, and vegan mayo. Texture won’t be identical, but it’s surprisingly close!
Herb & Cheese Twist: Fold in 1 tbsp finely chives and a pinch of grated Gruyère after cooking. Works well with Swiss bread.
Fruit-Infused Sweetness: Add 1 tsp finely diced candied orange peel or a whisper of Yuzu zest to the custard for a bright, citrusy lift—ideal for afternoon tea sandwiches.
8. Storage & Reheating
Store assembled (unpressed) sandwiches, tightly wrapped in plastic, in the fridge for up to 2 days. For best results, reheat in a toaster oven or air fryer at 325°F for 2–3 minutes until warm and crisp—don’t microwave; it’ll turn soggy.
Custard can be made up to 3 days ahead: Keep in an airtight container in the fridge. Let come to room temp, re-whisk, and proceed.
Freezing whole sandwich: Not recommended—the bread turns gummy. But you *can* freeze the custard (up to 1 month), thaw overnight in fridge, and reheat gently on the stovetop.
9. FAQ
Q: Why is my egg filling grainy?
A: Most likely, it was cooked too hot or stirred too aggressively after the eggs set. Always use low heat and constant, gentle stirring. Straining helps too!
Q: Can I use regular sandwich bread?
A: You can—but expect less fluffiness. For best results, choose a soft, square-sliced white bread like Wonder or Schär (for gluten-free). Lightly toast to firm up the crust first.
Q: How do I get the sandwich flat and even?
A: Use a heavy书 on top while resting, or press gently with the bottom of a small pan after cooking. Commercial tamago sando is often made in a rectangular press—your hand and a flat spatula work great at home!
Q: What pairs well with tamago sando?
A> Serve with miso soup, pickled vegetables (like umeboshi or tsukemono), or fresh fruit. For a full breakfast spread, pair with honey-pepper chicken wings for lunch or buffalo chicken sliders for a playful twist.
10. Conclusion
This fluffy Japanese egg sandwich isn’t just breakfast—it’s an experience. With its delicate sweetness, cloud-like texture, and elegant simplicity, it bridges tradition and modern convenience beautifully. Whether you’re feeding the kids, impressing guests, or treating yourself to a quiet moment with coffee, tamago sando delivers comfort in every bite. Try it once, and you’ll understand why it’s adored across oceans—and why it belongs in your everyday rotation.
Print
Fluffy Japanese Sandwich
This fluffy Japanese egg sandwich (tamago sando) is made with soft, slightly sweet milk bread and a creamy, savory-sweet custard-style egg filling — inspired by Japanese cafés and trending across social media.
- Total Time: 20 minutes
- Yield: 1 sandwich (serves 2)
Ingredients
- 4 slices soft white milk bread (such as shokupan)
- 3 large eggs
- 2 tbsp heavy cream
- 1 tbsp sugar
- ½ tsp salt
- 1 tbsp unsalted butter, melted
- Powdered sugar for dusting (optional)
- Butter for spreading (optional)
Instructions
- Whisk eggs, cream, sugar, and salt until fully combined and slightly frothy.
- Heat a nonstick pan over low heat, melt a bit of butter, and pour in the egg mixture.
- Cook slowly, stirring gently with a spatula until just set but still moist — like scrambled eggs but softer.
- Cool eggs slightly, then spread between 2 slices of milk bread (lightly buttered if desired).
- Top with remaining bread slices and press gently.
- Cut diagonally, dust with powdered sugar, and serve.
Notes
- For extra fluffiness, beat the egg mixture with a fork until very light.
- Cook on lowest heat to avoid browning — the goal is pale, creamyfilling.
- Use day-old bread if too crisp; fresh bread can be toasted lightly and dried in a low oven for better texture.
- Prep Time: 10 minutes
- Cook Time: 10 minutes
- Method: Stovetop
- Cuisine: Japanese
- Diet: Vegetarian
Nutrition
- Serving Size: Half sandwich
- Calories: 280 Kcal
- Sugar: 7g
- Sodium: 260mg
- Fat: 15g
- Saturated Fat: 7g
- Unsaturated Fat: 6g
- Trans Fat: 0g
- Carbohydrates: 26g
- Fiber: 1g
- Protein: 9g
- Cholesterol: 145mg