

🧀 Famous Cheesy Corn Dip: Your Next Crowd-Pleasing Appetizer That Disappears in Seconds!
1. Introduction
There’s nothing quite like the rich, creamy, and crave-worthy magic of a warm cheesy corn dip piping hot out of the oven. This irresistible recipe combines sweet corn, sharp cheddar, a whisper of spice, and just the right amount of creaminess to create an easy corn dip that vanishes faster than you can say “refill!” Whether you’re hosting a Super Bowl party, a backyard BBQ, or just need a last-minute snack, this crowd-pleasing appetizer delivers big flavor with minimal effort. Its comforting aroma and familiar, nostalgic taste make it a favorite across generations—and you’ll find yourself making it again and again. Let’s dive into the simple, proven steps to make this dip a staple in your rotation.
2. Why You’ll Love This Recipe
- ✅ Ready in under 25 minutes — from prep to table, no tedious steps.
- ✅ Pantry-staple ingredients — no strange or hard-to-find items.
- ✅ One-dish wonder — skip the extra bowls and cleanup.
- ✅ Versatile for dietary needs — easily adapts to vegetarian, gluten-free, or dairy-free preferences.
- ✅ Meal-prep or Party Hero — tastes even better as leftovers reheated (if it lasts that long!).
3. Ingredient Notes
The secret to this cheesy corn dip isn’t just the cheese—it’s the *quality* of the basics. Here’s why each ingredient matters:
- Frozen corn: Use thawed, well-drained frozen corn (not thawed and drained *too* aggressively—you want a little moisture for creaminess). If you’re feeling fresh and fancy, fire-roasted corn adds smoky depth!
- Cheddar cheese blend: A mix of sharp cheddar and mild Monterey Jack gives you bold flavor *and* meltability. Pre-shredded works in a pinch, but freshly shredded melts smoother and prevents graininess.
- Sour cream + cream cheese: This duo delivers richness and structure. Full-fat versions ensure a luscious, spoon-coating texture. Light versions can make the dip watery or chalky.
- Green chiles (diced, mild): Adds subtle heat and tang. canned, not fresh—canned chiles have more consistent flavor and texture for dips.
- Onion & garlic powder: Instant flavor boosters that season evenly without raw bite. Avoid fresh here—it can turn mushy or bitter when baked.
- Optional but recommended: A *pinch* of cayenne or smoked paprika at the end gives a whisper of complexity. Don’t skip the lime zest garnish—it cuts the richness beautifully.
4. Kitchen Tools You Need
You don’t need fancy gear—but having the *right* tools makes this easy corn dip foolproof. If you’re upgrading your kitchen, here’s how these trusted picks help:
- The Compact 6-in-1 Digital Air Fryer by Amazon Basics isn’t just for snacks—use it to toast poblano peppers or warm tortilla chips in minutes. Its precise temp control prevents soggy chips.
- A reliable T-fal 14-Piece Hard Anodized Nonstick Cookware Set ensures your sauté pan heats evenly when you soften the onions and garlic (yes, we do a quick sauté for depth!).
- Ninja Foodi Smart XL Indoor Grill & Air Fryer Combo: Love crispy edges? Broil your dip under the grill for 2 minutes to get golden, bubbly tops—no oven required.
- Ninja SLUSHi Pro RapidChill Drink Maker: Pair this dip with chilled craft sodas or margaritas—its rapid chill tech means drinks are ready before the dip finishes baking.
- Fullstar Ultimate Veggie Prep Master: While not essential here, this handy chopper can quickly dice onions and peppers if you’re using fresh instead of canned.
- CAROTE Premium 16pc Nonstick Cookware Set: Perfect for a one-pan cleanup—or make this dip straight in an oven-safe skillet and skip the bowl transfer!
- JoyJolt Airtight Glass Food Storage Set: Store leftovers in style—glass keeps flavors pure and prevents stains from that vibrant orange cheese.
Pro tip: A 9×9-inch baking dish or oven-safe skillet works best for even heating and easy serving.
5. How to Make Famous Cheesy Corn Dip
Here’s the method that guarantees creamy, crackling-top perfection every time—complete with visual cues to guide you.
Phase 1: Prep & Sauté (5 minutes)
Preheat oven to 375°F (190°C). In a medium skillet over medium heat, melt 1 tablespoon butter. Add ½ cup finely diced onion and sauté until soft and translucent—about 3–4 minutes. Don’t brown it; we want sweetness, not crispness. Stir in 1 minced garlic clove and cook 30 seconds until fragrant. Transfer to a large mixing bowl to cool slightly.
Phase 2: Creamy Base (3 minutes)
To the bowl with the onions, add 1 cup sour cream, 1 block (8 oz) cream cheese, softened, 1 (10 oz) can diced green chiles (undrained), and 1 cup thawed frozen corn (well-drained). Mix until completely smooth—no lumps! Then stir in 1 tsp garlic powder, ½ tsp onion powder, and ¼ tsp cayenne (optional).
Phase 3: Cheese Magic (2 minutes)
Add 2 cups shredded sharp cheddar and 1 cup shredded Monterey Jack. Mix just until combined—overmixing can make the cheese greasy. Taste and adjust seasoning: a squeeze of lime juice brightens it, while a pinch of salt enhances savoriness.
Phase 4: Bake & Broil (12–15 minutes total)
Spoon the mixture into a greased 8×8-inch baking dish. Top with the remaining ½ cup shredded cheddar. Bake for 12–14 minutes, until the edges are bubbling and the center is set. Then switch the oven to broil (high setting) and broil 1–2 minutes *watching closely* until the top is deep golden and bubbly. Let rest 5 minutes—this is crucial! It firms up slightly and gets even creamier.
Phase 5: Garnish & Serve
Top with fresh cilantro, a drizzle of sour cream, and a twist of lime zest. Serve with sturdy dippers like tortilla chips, jicama sticks, or sliced baguette toasted in your air fryer.
6. Expert Tips for Success
- Drain corn like a pro: Spread thawed corn on a paper towel–lined plate and press gently. Wet dip = runny dip.
- Softened cream cheese is non-negotiable: Microwaving it for 20 seconds with a splash of milk helps, but roomTemp is safer. Lumps ruin texture.
- Don’t skip the 5-minute rest: Heat continues cooking the dip after it leaves the oven. Serving too early = watery disappointment.
- For extra richness: Stir in ¼ cup cream gravy or a splash of half-and-half *before* baking—just a little goes a long way.
- Make it ahead: Assemble up to 24 hours ahead; cover and refrigerate. Add 5 minutes to bake time (cover with foil first to prevent over-browning).
7. Variations & Substitutions
- Low-Carb: Swap corn for cauliflower “rice” (sautéed & well-drained). Increase cheese and sour cream, reduce chiles.
- Spicy Version: Add 1 diced jalapeño (seeds in for heat), 1 tsp chipotle in adobo, or a dash of hot sauce.
- Smoky Twist: Stir in 2 tbsp crumbled cooked bacon or 1 tsp smoked salt. Top with crispy pancetta.
- Dairy-Free: Use cashew cream + vegan sour cream, Miyoko’s mozzarella shreds, and ensure chiles/seasonings are vegan.
- Gluten-Free: Naturally! Just double-check your dried spices and sour cream aren’t processed with wheat fillers.
8. Storage & Reheating
Store cooled leftovers in an airtight glass container for up to 4 days. reheating is key: – Oven (best): Cover with foil, 350°F for 20–25 minutes until hot throughout. – Microwave: Heat in 30-second bursts, stirring in between—takes 1.5–2 minutes total. Stir in 1 tsp milk if dry. – Re-crisp chips: Air fry leftover tortilla chips at 350°F for 2–3 minutes for fresh-out-the-fryer crunch.
9. FAQ
Q: Can I use canned corn instead of frozen?
A: Yes—but drain *very* well. Canned corn is wetter, so spread it on a towel and squeeze out extra liquid. Alternatively, rinse and drain for 10 minutes.
Q: My dip turned out grainy—what went wrong?
A> Often caused by pre-shredded cheese (it contains cellulose to prevent clumping) or overheating. Try freshly shredding your own, and avoid boiling the cream cheese mixture—warm, not hot, when combining.
Q: How do I make it in an air fryer?
A: Use a small, oven-safe ramekin. Air fry at 350°F for 15–18 minutes, checking at 12. Broil for 1–2 minutes at the end if needed.
Q: Can I omit the sour cream?
A: Not without consequences. It provides acidity and body. Substitute with plain Greek yogurt for tang (drain first), but reduce garlic powder slightly—yogurt can dominate.
10. Conclusion
This cheesy corn dip is more than just an appetizer—it’s the edible hug your party deserves. With its perfect balance of sweet, tangy, creamy, and just-a-little-spicy, it proves that simplicity *gets* it right. Whether you’re serving at a big bash or enjoying a cozy night in, this dip delivers comfort on a plate. Bonus: Pair it with any of our crowd-pleasing mains like our high-protein honey BBQ chicken mac and cheese or comforting bread pudding for a full menu. Get ready for requests—and repeat batches. Happy dipserving!
Print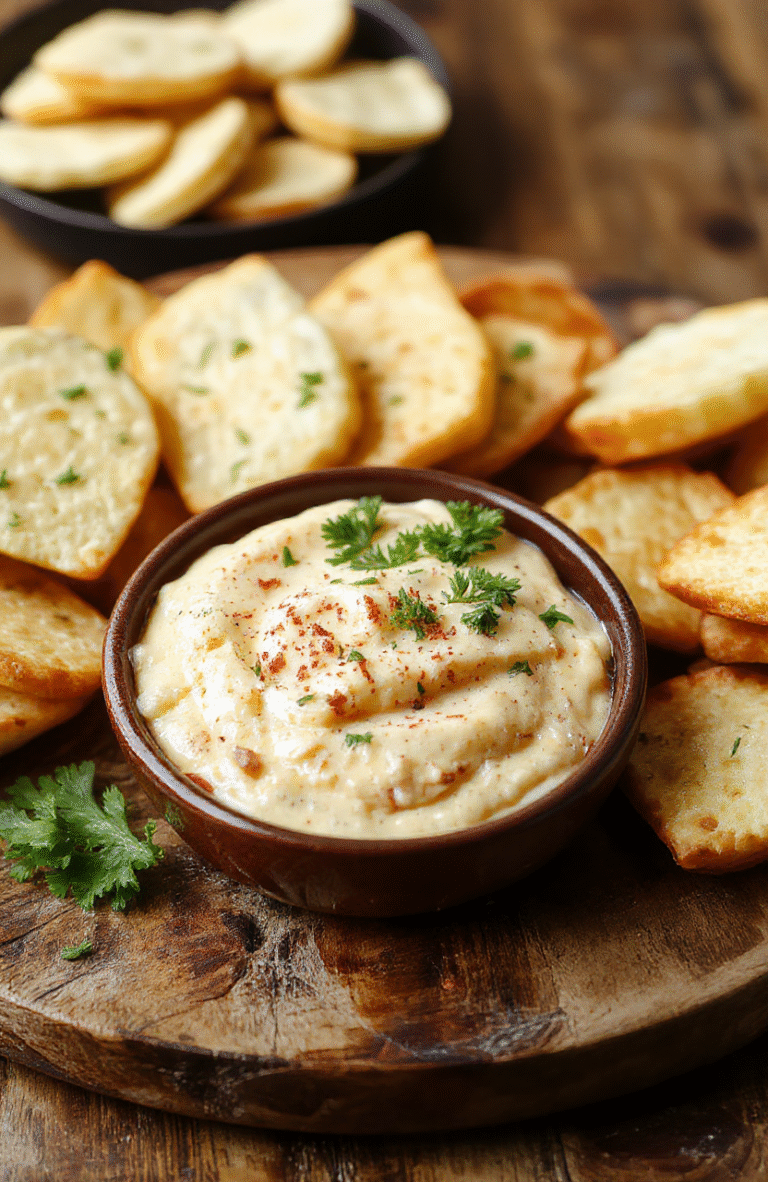
Famous Cheesy Corn Dip: Quick, Easy Crowd-Pleaser
A beloved, ultra-creamy corn dip made with just a few pantry staples—perfect as a party appetizer or snacks. Baked until bubbly and golden, then topped with fresh herbs.
- Total Time: 30 minutes
- Yield: 6–8 servings
Ingredients
- 1 (15 oz) can whole kernel corn, drained
- 1 (8 oz) block cream cheese, softened
- 1 cup sour cream
- 1 cup shredded sharp cheddar cheese
- 1/2 cup shredded Monterey Jack cheese
- 1 tsp garlic powder
- 1/2 tsp salt
- 1/4 tsp black pepper
- 2 tbsp fresh parsley or cilantro, chopped (optional garnish)
- sliced jalapeños and extra cheese for topping
- tortilla chips for serving
Instructions
- Preheat oven to 375°F (190°C). Lightly grease a 1.5-quart baking dish.
- In a medium bowl, mix cream cheese, sour cream, corn, cheddar, Monterey Jack, garlic powder, salt, and pepper until smooth.
- Spoon into baking dish, sprinkle with extra cheese and jalapeños.
- Bake 18–22 minutes until bubbly and golden on top.
- Garnish with fresh herbs and serve warm with tortilla chips.
Notes
- For extra heat, add 1/4 tsp cayenne or 1 canned chipotle pepper, minced.
- Make ahead: Assemble (unbaked), cover, and refrigerate up to 24 hours. Add 5 minutes to bake time if cold from fridge.
- Vegan option: Use dairy-free cream cheese, vegan sour cream, and shredded plant-based cheese—bake 25 minutes.
- Prep Time: 10 minutes
- Cook Time: 20 minutes
- Method: Baking
- Cuisine: American
- Diet: Vegetarian
Nutrition
- Serving Size: 1/2 cup dip + 10 chips
- Calories: 220 Kcal
- Sugar: 3g
- Sodium: 410mg
- Fat: 16g
- Saturated Fat: 9g
- Unsaturated Fat: 6g
- Trans Fat: 0g
- Carbohydrates: 12g
- Fiber: 1g
- Protein: 7g
- Cholesterol: 45mg