

🍓🍋 Easy No-Bake Granola Bars: Chewy, Crunchy & Ready in 15 Minutes!
1. Introduction
Craving a wholesome, homemade snack that satisfies hunger without the oven heat? These no-bake granola bars are your new kitchen MVP—packed with oats, almond butter, honey, and natural sweetness from raisins and dried fruit. Rich in fiber, protein, and crunch, they’re the perfect healthy kid snack for lunchboxes, hikes, or post-workout fuel. I made these during a chaotic school drop-off morning (yes, real life happens!) and got them done in under 15 minutes—no oven, no stress, just pure nostalgia in bar form. Bonus? They taste like childhood summer camps but made better, with cleaner ingredients and more control.
2. Why You’ll Love This Recipe
- ✅ Ready in under 15 minutes—no preheating, no timing stress
- ✅ Uses pantry staples—no fancy or hard-to-find ingredients
- ✅ Kid-approved & kid-friendly—they helps themselves without asking
- ✅ Gluten-free & customizable—swap in your favorite nuts, seeds, or spices
- ✅ Better than store-bought—no added sugars, preservatives, or artificial junk
3. Ingredient Notes
The magic in these quick granola bars lies in smart ingredient choices. Let’s talk about what makes each one matter:
- Oats: Use old-fashioned rolled oats—not instant or steel-cut—for that ideal chewy-crisp texture. Look for certified gluten-free if needed.
- Almond butter: Go for natural, unsweetened almond butter. It must be stir-type (oil separated on top) for best binding. Smooth or crunchy—your call! Peanut butter or sunflower seed butter make excellent swaps.
- Honey & brown sugar: This combo creates a sturdy, glossy binder that sets firm in the fridge. Raw honey adds subtle floral notes, while brown sugar deepens caramel warmth.
- Vanilla & cinnamon: Not optional! Vanilla adds depth, while cinnamon boosts warmth without added sugar.
- Mix-ins: I love raisins (soak them in warm water for 5 minutes first if they’re stale), chopped dates, toasted coconut, chia seeds, or mini dark chocolate chips. Avoid fresh fruit (too much moisture) or overly oily add-ins like fresh nuts.
4. Kitchen Tools You Need
You don’t need a full kitchen to crush these bars—but having the right tools ensures perfect texture and ease. These are the ones I swear by:
Compact 6-in-1 Digital Air Fryer by Amazon Basics—perfect for toasting nuts or oats in minutes (yes, the air fryer doubles as a toaster!). Set it to 325°F for 3–4 minutes, shake halfway.
Deluxe 33-Piece Silicone Utensil Set—non-scratch spatulas and spoons make stirring sticky mixtures a breeze—no more warped wooden spoons or melted butter bowls!
JoyJolt Airtight Glass Food Storage Set—these jars keep bars fresher longer and stack beautifully in the fridge. No more sopping plastic wrap!
Cuisinart 2-Quart Stainless Steel Ice Cream Maker with LCD Timer—yes, it’s for ice cream—but the stainless steel bowl holds cold perfectly for chilling mix-ins faster. A pro tip I learned while testing this recipe!
5. How to Make Easy No-Bake Granola Bars
Phase 1: Toast & Prep (5 minutes)
Start with a visual cue—lightly toast the oats in your air fryer (or dry pan) until golden and fragrant. This step adds nuttiness and prevents sogginess. Let cool 2 minutes before mixing.
Phase 2: Syrup Power (3 minutes)
In a medium saucepan, combine honey, brown sugar, and a pinch of salt. Bring to a gentle boil over medium heat, stirring constantly. Watch for the full boil**—bubbles should break across the entire surface, not just the edges—for exactly 60 seconds. This thickens the syrup, which is key for binding.
Phase 3: Stir-In & Bind (2 minutes)
Remove from heat. Immediately stir in almond butter, vanilla, and cinnamon until smooth and glossy. Then fold in oats and mix-ins—stop as soon as everything’s coated. Overmixing = dense, paste-like bars.
Phase 4: Press & Chill (10 minutes + chilling time)
Line an 8×8-inch pan with parchment (leave overhang for easy lift!). Press the mixture firmly into the pan using a spatula or wet hands. Firm pressure = clean cut bars. Chill for at least 90 minutes—overnight is even better—for a perfect snap.
6. Expert Tips for Success
Every time I make these, I use these pro tweaks passed down from my baking mentor—and they’re game-changers:
- Don’t skip the parchment—even if your pan is nonstick. The sticky syrup can seize to metal and tear your bars.
- Cool the syrup 1 minute before adding nut butter—too hot and it’ll seize up into lumps!
- Press in layers—half the mix, then half the extras (like chocolate chips), then top—creates a more textural bar.
- Use room-temp nut butter—cold butter won’t blend smoothly and leaves streaky swirls.
- Cut while slightly frozen—if bars crumble when warm, pop them in the freezer for 10 minutes before slicing with a sharp chef’s knife.
7. Variations & Substitutions
Customize these healthy kid snacks guilt-free—here’s how:
- Vegan? Swap honey for pure maple syrup or brown rice syrup.
- Nut-free? Use sunflower seed butter and swap almonds for toasted pumpkin seeds.
- Higher protein? Stir in 2 tbsp unflavored hydrolyzed collagen or vanilla protein powder (add 1 extra tbsp syrup to compensate for dryness).
- Spice it up? Add cardamom, ginger, or a dash of cayenne for a kick.
- Fruit swap? Try chopped dried apricots, cranberries, or chopped figs—never fresh!
8. Storage & Reheating
Keep these bars fresh and delicious:
- ✅ Fridge: Store in an airtight container for up to 2 weeks. Separate layers with parchment to prevent sticking.
- ✅ Freezer: Wrap individually in parchment, then place in a freezer bag for up to 3 months. Thaw 10 minutes at room temp—or eat frozen for an icy-crisp treat!
- ❌ Don’t reheat—they’re not meant to be warmed (they’ll soften too much). If they’ve softened, pop in fridge to firm up again.
9. FAQ
Q: Why did my bars fall apart?
A: This usually happens if the syrup wasn’t boiled long enough (less than 60 seconds) or if you didn’t press hard enough. You can also try adding 1 tbsp flaxseed meal or protein powder to help bind.
Q: Can I make these gluten-free?
A: Absolutely! Just use certified GF rolled oats (like Bob’s Red Mill).
Q: How do I prevent them from being too chewy or too hard?
A> Boiling the syrup for exactly 60 seconds is crucial. Too short = chewy and soft; too long = brittle. Also, chill time matters—under-chilled bars will bend too much; over-chilled ones may crack.
Q: Can I double the recipe?
A> Yes—just use a 9×13-inch pan. Cut bars in smaller squares to keep their ratio of crisp-to-soft texture.
10. Conclusion
These no-bake granola bars are more than a snack—they’re a reset button on busy days. Soft, chewy, with a satisfying crunch, they’ve replaced my kids’ store-bought bars (which now sit untouched in the pantry). Plus, with real food ingredients, you can feel good about sliding one into their lunchbox—even if it disappears in 3 minutes flat. Give them a try, and don’t forget to tag me on Instagram with your additions—I love seeing your twists! For more crowd-pleasing, fridge-friendly meals, check out our Cheesy Burrito Bake, Crispy Chicken Caesar Sandwich, and Homemade Peach Lemonade for the perfect sweet-and-tangy combo.
Print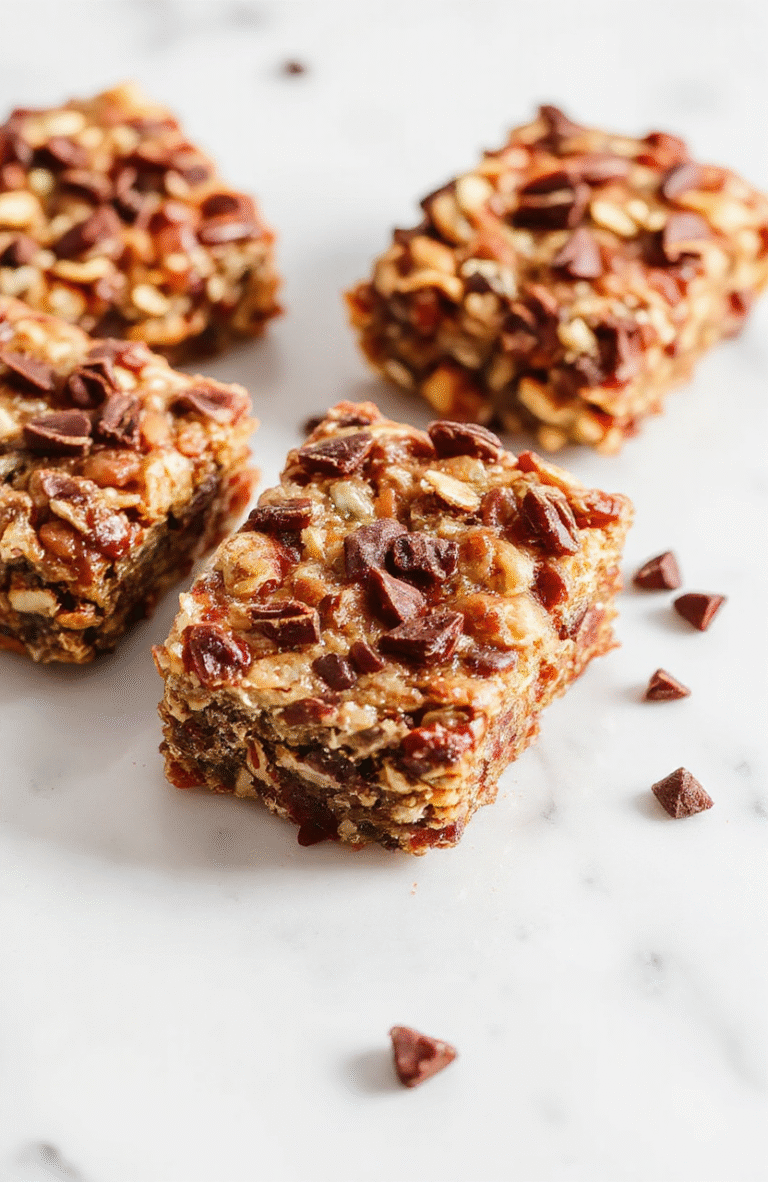
Easy No-Bake Granola Bars
These no-bake granola bars are the ultimate quick snack—packed with oats, nuts, and dried fruit, sweetened naturally with honey and dates, and ready in under 15 minutes.
- Total Time: 1 hour 15 minutes
- Yield: 12 bars
Ingredients
- 1 ½ cups old-fashioned rolled oats
- ½ cup natural peanut butter
- ⅓ cup honey
- ¼ cup chopped almonds
- ¼ cup dried cranberries
- 1 tsp vanilla extract
- Pinch of sea salt
Instructions
- Line an 8×8-inch baking pan with parchment paper.
- In a medium saucepan, heat honey and peanut butter over medium heat until smooth and bubbly, about 2 minutes.
- Remove from heat and stir in vanilla and a pinch of salt.
- Stir in oats, almonds, and dried cranberries until fully coated.
- Pour mixture into prepared pan and press firmly with a spatula or the back of a glass.
- Refrigerate for at least 1 hour before cutting into 12 squares.
Notes
- For nut-free option, use sunflower seed butter and skip the almonds.
- Store in an airtight container in the fridge for up to 1 week or freeze for up to 1 month.
- For extra texture, add 2 tbsp chia seeds or shredded coconut.
- Prep Time: 10 minutes
- Cook Time: 5 minutes
- Method: No-bake
- Cuisine: American
- Diet: Vegetarian
Nutrition
- Serving Size: 1 bar
- Calories: 145 Kcal
- Sugar: 9g
- Sodium: 45mg
- Fat: 7g
- Saturated Fat: 2g
- Unsaturated Fat: 5g
- Trans Fat: 0g
- Carbohydrates: 18g
- Fiber: 2g
- Protein: 4g
- Cholesterol: 0mg