
🍣 Easy DIY Sushi Maker: Homemade Rolls in Minutes (No Experience Needed!) 🍣
1. Introduction
Craving sushi but dreading the price tag or complexity of traditional prep? Say hello to easy homemade sushi that’s ready in under 20 minutes—no bamboo mat, no fancy skills, and absolutely no takeout box required. This DIY sushi maker method uses everyday kitchen tools (and maybe even your hands!) to craft delicious, customizable rolls that look impressive but feel effortless.想象 the rich seafood, crisp veggies, and warm rice wrapped in smooth nori—all made fresh, exactly how you like it. Whether it’s a weeknight craving or a weekend gathering, this solution delivers authentic sushi joy without the stress.
2. Why You’ll Love This Recipe
- ⏱️ Ready in 20 minutes—faster than delivery, healthier too!
- 🍚 Simple ingredients—no hard-to-find items (just rice, nori, fillings)
- 🥢 Fully customizable—go classic with salmon or get creative with tofu & avocado
- 👶 Family-friendly—kids love assemble-your-own sushi bar!
- 💰 Saves big—a store-bought roll can cost $8+; this costs under $2 per roll
3. Ingredient Notes
Let’s talk quality—because easy homemade sushi lives or dies by its core components.
Short-grain sushi rice is essential. It has the right starchiness to hold the roll together. If you don’t have Japanese short-grain, Calrose works well. Pro tip: Always rinse the rice 4–5 times until water runs clear—it removes excess starch and prevents gumminess.
Nori (seaweed sheets) should be black-green, crisp, and free of cracks. Once opened, store in an airtight container with a silica packet to prevent moisture exposure.
Fresh fillings: Use sushi-grade fish if serving raw. For a safer, vegetarian-friendly option, fully cooked imitation crab, smoked salmon, or roasted sweet potato are excellent. crisp cucumber (English or hothouse) gives that signature crunch, while ripe avocado adds creamy richness.
Rice vinegar, sugar, and salt for seasoning the rice—that’s your “ sushi-zuke. ” Store-bought seasoning can be salty; mixing your own gives control over flavor and sodium.
4. Kitchen Tools You Need
You won’t need a dedicated sushi station—just a few smart tools that make prep smoother:
The T-fal 14-Piece Hard Anodized Nonstick Cookware Set is a game-changer for cooking the rice evenly—its heavy base prevents scorching, which ruins delicate sushi rice. Plus, the included steamer basket is perfect for fluffing rice between cooking and assembly.
For quick rice prep, the Cuisinart Compact Automatic Bread Maker doubles as a rice cooker—use the “sushi rice” setting to eliminate monitoring. Set it and go while you prep fillings!
Fullstar Ultimate Veggie Prep Master slicing discs turn carrots, cucumbers, and avocado into perfect, uniform julienne strips in seconds—critical for neat rolling and beautiful cross-sections.
And for serving? The JoyJolt Airtight Glass Food Storage Set keeps leftover nori crisp and cut veggies fresh—no more soggy seaweed by dinnertime.
Bonus: If you’re hosting more often, the Ninja 12-in-1 Smart Double Oven with FlexDoor can Toast nigiri bases in minutes—just brush rice-slathered slices with oil and toast at 400°F for 3 minutes. Yes, that’s sushi in *minute* form.
5. How to Make Easy Homemade Sushi
Step 1: Cook and Season the Rice
Begin 30 minutes before assembly. Rinse 1 cup sushi rice until clear. Cook (stovetop, rice cooker, or in the Cuisinart Bread Maker) with 1¼ cups water. Let steam 10 minutes uncovered, then transfer to a large bowl. Whisk together 3 tbsp rice vinegar, 1 tbsp sugar, and 1 tsp salt. Drizzle over warm rice, folding gently with a wooden spoon until glossy and cohesive. Cover with a damp towel—do not refrigerate yet.
Step 2: Prep Fillings (10 minutes)
Julienne ½ cucumber (seeds removed), slice 1 ripe avocado into thin ribbons, and thin-slice 4 oz cooked shrimp or imitation crab. Keep chilled until assembly.
Step 3: Assemble the Roll (Your DIY Sushi Maker Moment!)
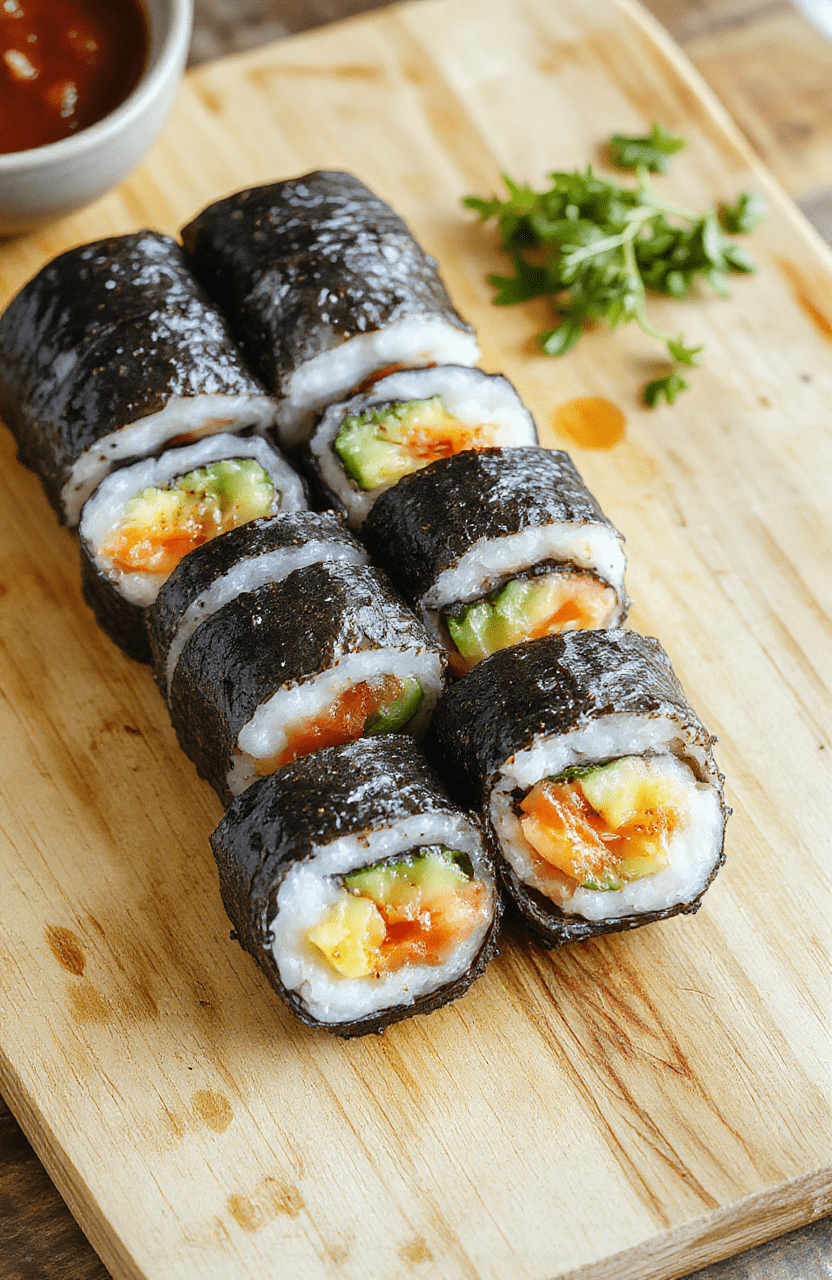
Place a sheet of nori shiny-side down on a clean cutting board or plate. Dip wet fingers in vinegar water (1 tbsp vinegar + ½ cup water) to prevent sticking—critical for clean handling. Spread ¾ cup seasoned rice evenly over the nori, leaving a ½-inch border at the top. Layer fillings in a central line: 2 avocado ribbons, 3 cucumber sticks, 2 crab pieces.
Step 4: Roll Like a Pro
Lift the near edge of the board and gently roll it away from you, applying light, even pressure to compress the fillings. Seal the edge with a dab of water. Rest seam-side down for 1 minute before slicing.
Step 5: Clean Cuts, Every Time
Use a very sharp, wet knife (dip in water before each slice). Cut the roll in half, then each half in half again. Wipe the blade between cuts—this prevents sticking and ensures neat, glossy edges.
6. Expert Tips for Success
From practice, here’s what separates good rolls from *great* ones:
Don’t over-fill. Too much rice or fillings = spongy,破裂 rolls. Aim for ≤1 cup total per sheet.
Warm rice, cold fillings. Warm rice is pliable; chilled fillings help the roll hold shape.
Press gently but firmly. Over-compressing squeezes out moisture; under-pressing causes falling apart. Find the “golden squeeze”—the rice should feel springy, not dense.
Use a plastic wrap sling. Place a sheet of plastic wrap over the nori before adding rice. Roll with the wrap on—then peel it off before slicing. No-stick, no-fuss. 🎯
Toast nori briefly. Hold a sheet over an open flame for 5 seconds with tongs—thencool. This deepens flavor and adds crispness.
7. Variations & Substitutions
- Vegan sushi: Swap fish for marinated tofu (baked or pan-fried), pickled radish, and roasted eggplant.
- Spicy rolls: Mix 2 tbsp mayo with 1 tsp sriracha + dash of sesame oil—and pipe onto rolls.
- Wraps without nori: Use thin soy paper (found in most grocery stores) or large butter lettuce leaves for a low-carb option.
- Gluten-free: Ensure tamari (not soy sauce) is used in any dipping sauce; verify imitation crab is GF.
8. Storage & Reheating
Best consumed immediately—rice firms up in the fridge and nori sags. But if you must store:
- Refrigerate (up to 12 hours): Wrap tightly in plastic, store in airtight container. Lay flat—not stacked—to avoid squishing.
- Reheat rice rolls: Steam for 2–3 minutes (cover to trap moisture) or microwave unwrapped on low 20 seconds. Never bake or air-fry—norii turns rubbery.
- Restore crispness: Lightly toast the nori with a kitchen torch or under a salamander (very briefly!)—just until it “pops” back to life.
9. FAQ
Can you make sushi without a bamboo mat?
Absolutely! Use a clean kitchen towel or plastic wrap as a “rolling sleeve.” Or, for ultimate simplicity: make chirashizushi (scattered sushi)—just spoon rice into a bowl, top with fillings, and dig in. No rolling needed!
Is supermarket fish safe for raw sushi?
Only if labeled sushi-grade or sashimi-grade, and frozen properly. When in doubt, cook the fish (poach shrimp, sauté scallops, or bake salmon at 400°F for 8 minutes). Safety first!
Why did my sushi fall apart?
Three common culprits: (1) Rice too hot when rolled—let it cool 10 mins; (2) Overfilled roll; (3) Dry nori that cracked. Always keep nori sealed until use, and roll on a slightly damp cloth—keeps it flexible.
What if I don’t have sushi rice?
Short-term fix: arborio rice (similar starch) or jasmine + 1 tbsp cornstarch + extra water. But long-term? A cheap bag of Japanese short-grain ($5–7 online) pays off in texture and consistency.
10. Conclusion
Making easy homemade sushi isn’t just doable—it’s joyful. You’ll impress guests, control portion sizes, and avoid the MSG-heavy trap of restaurant rolls. With your new DIY sushi maker confidence, try experimenting tomorrow: add pickled ginger to rice, or roll with mango and jalapeño for a tropical twist. Now go ahead—roll, slice, and savor. The kitchen is your sushi bar. 🍱
Print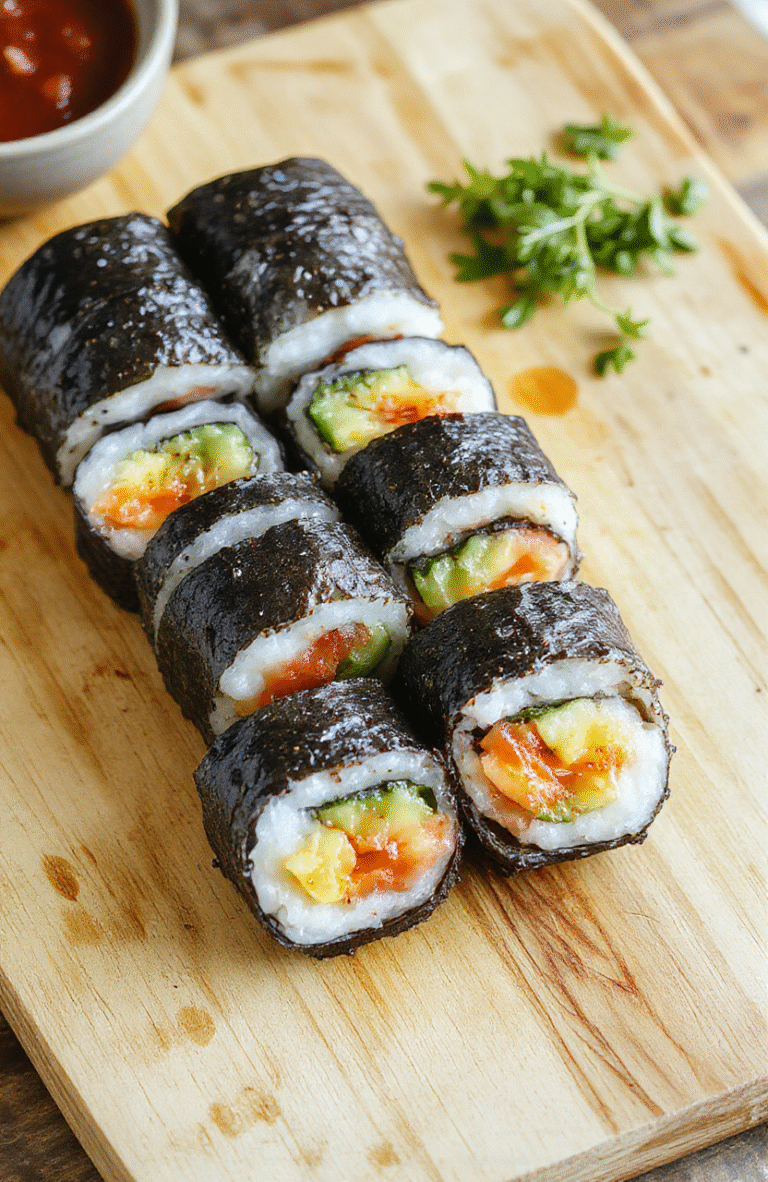
Easy DIY Sushi Maker: Homemade Rolls in Minutes
A simplified, no-mat-needed sushi-making method using everyday kitchen tools for perfect homemade rolls in under 20 minutes.
- Total Time: 30 minutes
- Yield: 2 rolls (4 servings)
Ingredients
- 2 cups sushi rice, cooked and seasoned with rice vinegar, sugar, and salt
- 4 raw cucumber sticks (julienne)
- 1 ripe avocado, sliced
- 1/2 lb sushi-grade salmon or tuna, thinly sliced
- 4 sheets nori (seaweed)
- Pickled ginger, for serving
- Wasabi and soy sauce, for dipping
Instructions
- Place a sheet of nori on a clean kitchen towel or plate.
- Warm hands with water, then spread 1/4 cup sushi rice evenly over the nori, leaving a 1-inch border at the top edge.
- Arrange cucumber, avocado, and seafood in a line across the center.
- Using the towel to help guide, gently roll the nori away from you, pressing lightly to seal.
- Repeat with remaining ingredients.
- Serve immediately with pickled ginger, wasabi, and soy sauce.
Notes
- For heat-safe hands, dip fingers in a bowl of vinegar water (1 tbsp rice vinegar + 1/2 cup water) to prevent sticking.
- Use pre-cooked, unseasoned rice for fastest prep.
- Vegetarian? Swap fish for shredded carrot or spicy mayo-drizzled tofu.
- Prep Time: 10 minutes
- Cook Time: 20 minutes
- Method: Hand-rolled
- Cuisine: Japanese
- Diet: Pescatarian
Nutrition
- Serving Size: 1 roll
- Calories: 280 Kcal
- Sugar: 5g
- Sodium: 420mg
- Fat: 8g
- Saturated Fat: 2g
- Unsaturated Fat: 4g
- Trans Fat: 0g
- Carbohydrates: 45g
- Fiber: 3g
- Protein: 10g
- Cholesterol: 25mg