

Chili Red Pepper Flakes: A Fiery Addition to Your Culinary Adventures 🌶️✨🔥
1. Introduction
If you’re a spice enthusiast eager to elevate your culinary creations, creating your own chili pepper flakes at home is a fantastic way to do it. Homemade red pepper flakes offer a fresh, vibrant, and intense flavor profile that store-bought versions simply can’t match. By crafting your own crushed chili pepper, you control the heat and flavor, resulting in a more personalized spice experience. In this guide, we’ll walk you through the entire process of making your own chili flakes from fresh red chili peppers, ensuring you have a consistently versatile and deliciously spicy ingredient at your fingertips. From selecting the right peppers to storage, let’s dive into the simple yet incredibly satisfying world of homemade chili flakes!
2. Ingredients
- Fresh red chili peppers (about 10-15 for a batch, consider varieties like Cayenne or Fresno for different heat levels)
- Oven or dehydrator (for perfectly even drying)
- Mortar and pestle or spice grinder (for achieving your desired flake consistency)
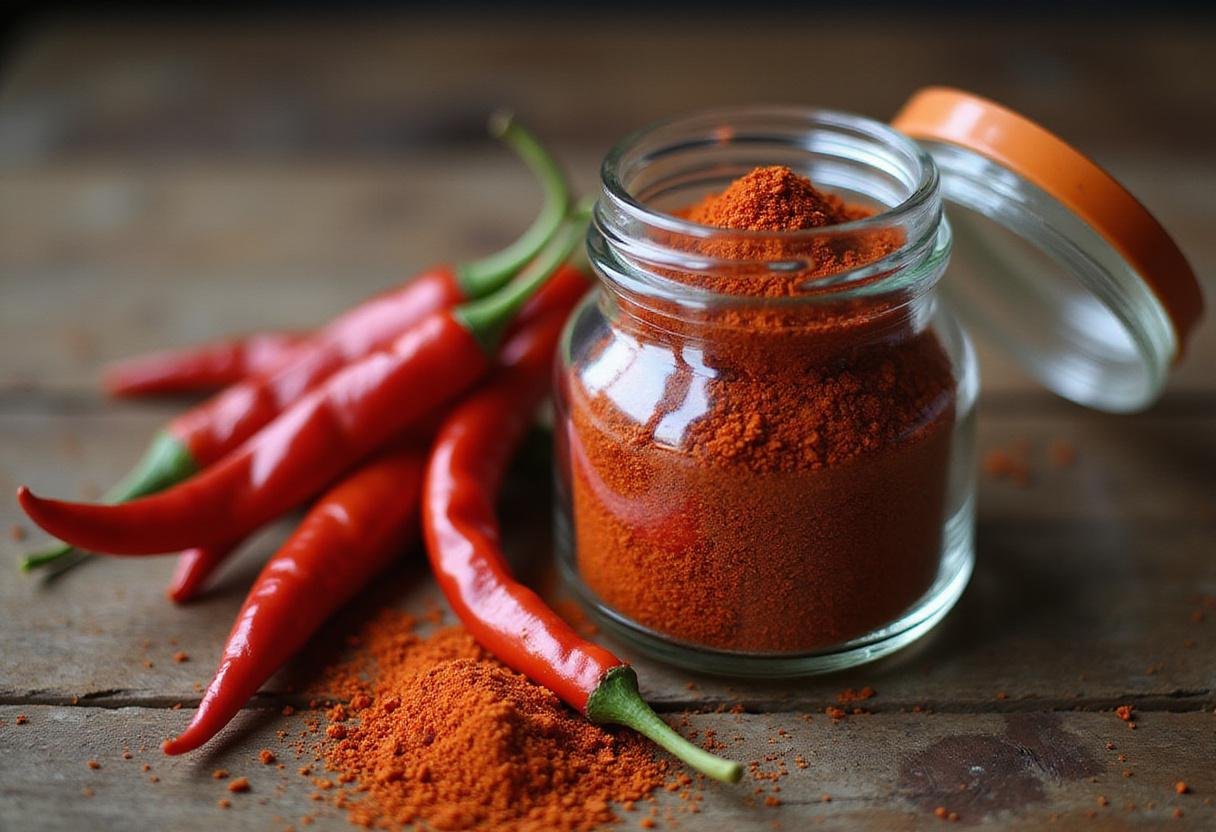
- Glass jar for storage (airtight to maintain freshness)
3. Step-by-Step Instructions
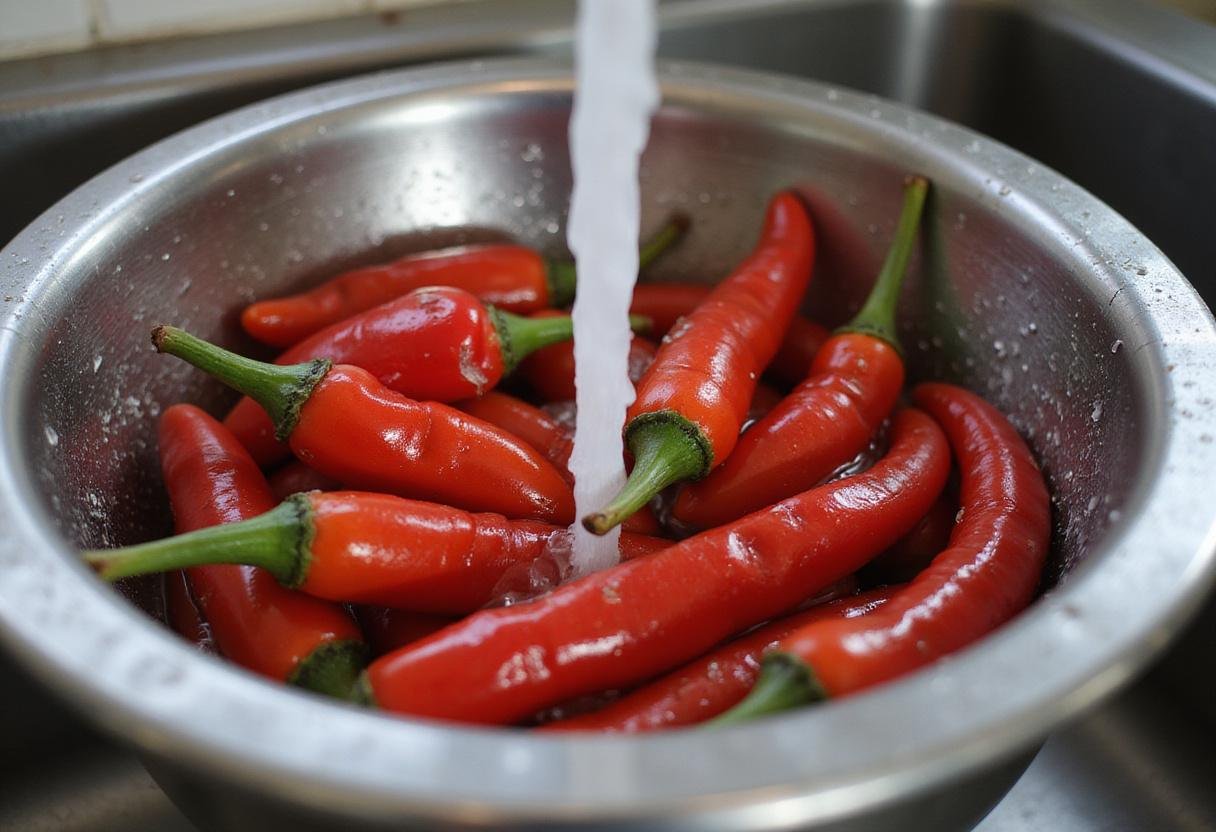
Step 1: Rinse the Fresh Red Chili Peppers
Begin your journey towards delicious homemade chili pepper flakes by rinsing the fresh red chili peppers thoroughly under cool, running water. This crucial step removes any lingering dirt, pesticide residue, or impurities, ensuring that your homemade chili flakes are clean, pure, and ready for the subsequent preparation steps. Give them a good scrub to get them squeaky clean!
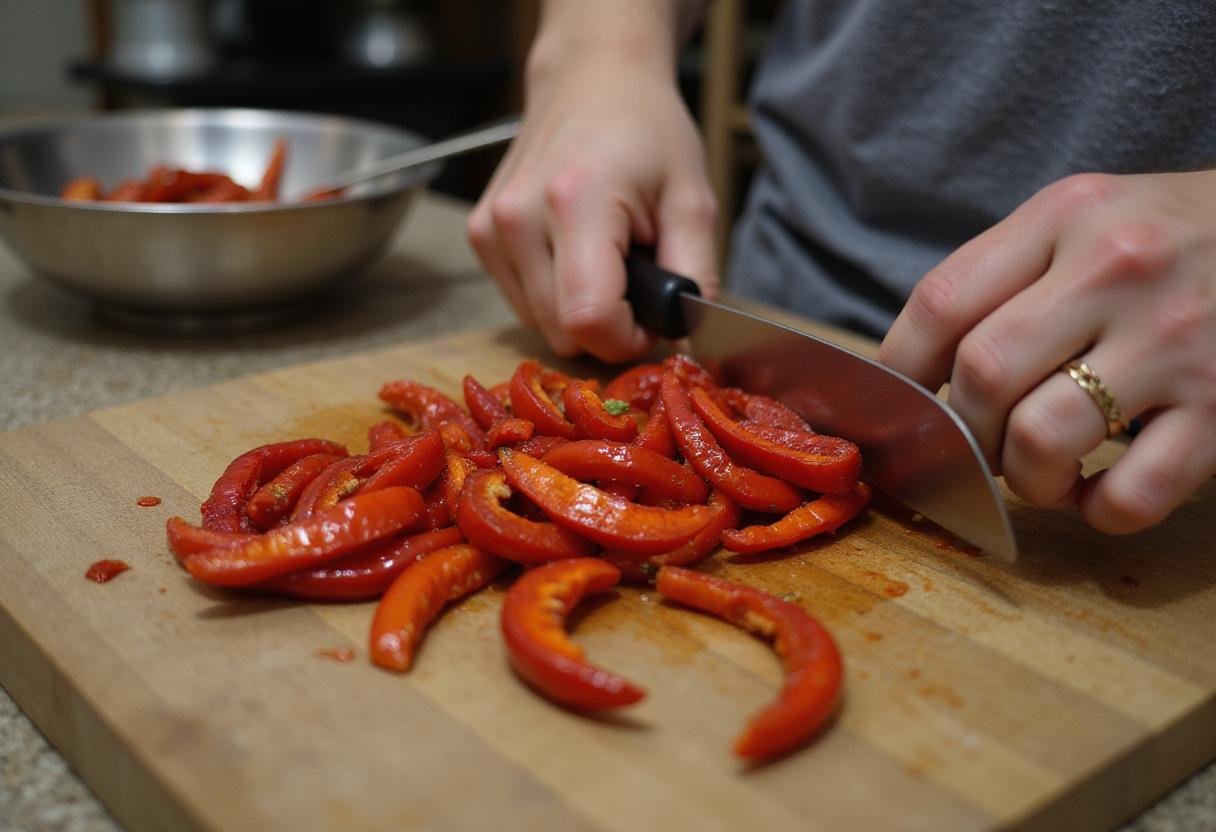
Step 2: Slice the Red Chili Peppers
Once you’ve rinsed the peppers, it’s time to prepare them for drying. Carefully slice the fresh red chili peppers in half lengthwise, from stem to tip. This seemingly simple step is actually critical for several reasons. First, slicing the peppers allows for quicker and more uniform drying, preventing mold growth and ensuring that the peppers dehydrate evenly. Second, it enhances the flavor concentration, intensifying the spicy aroma and taste of your homemade red pepper flakes. If you are feeling adventurous, try using different types of peppers to make a variety of chili flakes! You might also enjoy these Spicy Peanut Noodles
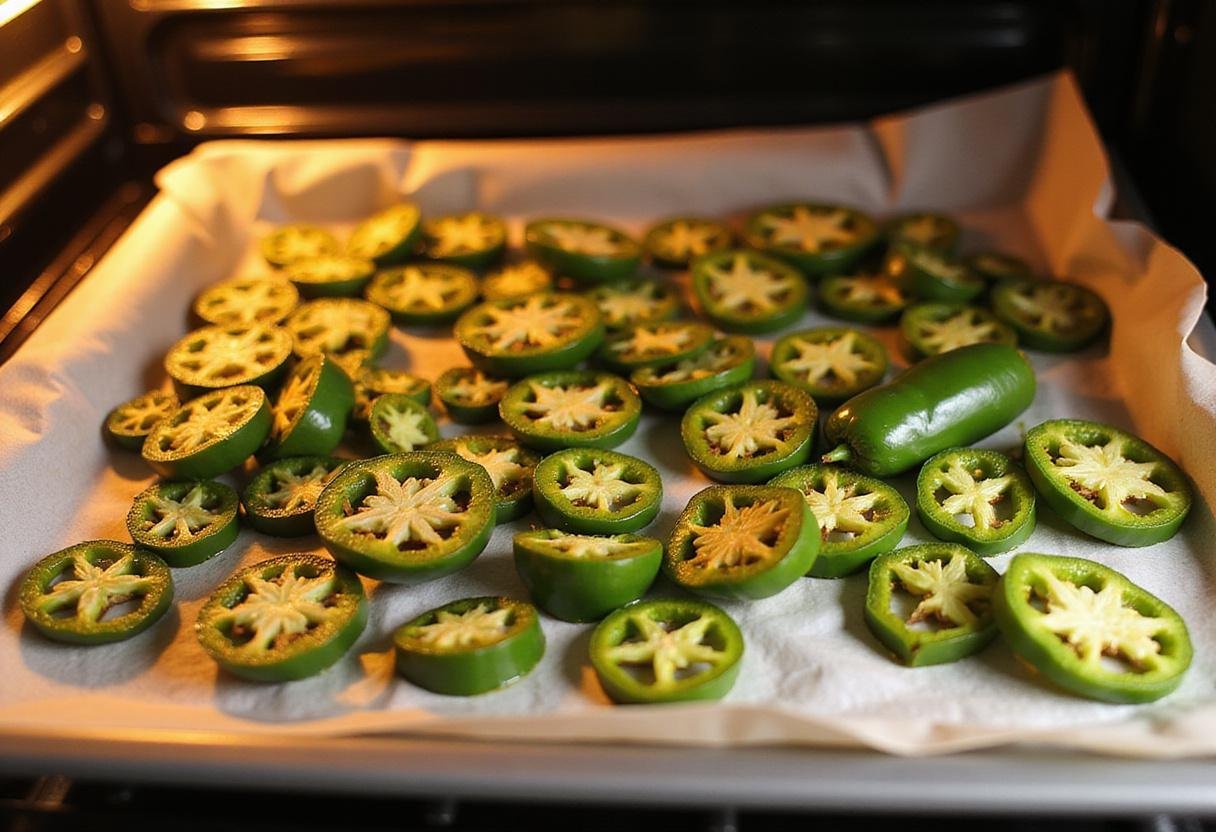
Step 3: Dry the Chili Peppers
Next comes the crucial process of drying the chili peppers. Arrange the sliced chili peppers in a single layer on a baking sheet, ensuring they are not overlapping. Place the sheet in the oven on the lowest possible setting (ideally around 170-200°F or 75-93°C). The goal is to gently dry out the peppers until they become brittle and easily breakable, which typically takes about 6-8 hours, depending on your oven and the moisture content of the peppers. Alternatively, you could use a dehydrator, following the manufacturer’s instructions for drying peppers. This thorough drying process is absolutely essential to create the intensely flavorful crushed chili pepper that you ultimately desire. It concentrates the natural oils and capsaicin, resulting in a more potent and longer-lasting spice. Discover new dinner inspirations here.
Step 4: Crush the Dried Chili Peppers
Once the chili peppers are thoroughly dried and have cooled down (handling hot peppers can be irritating to the skin), it’s finally time to transform them into flakes! Using a mortar and pestle, gently crush the dried peppers, applying consistent pressure to break them down into smaller pieces. Alternatively, a spice grinder can be used for a more uniform consistency, but be cautious not to over-process them into a powder. The simple act of crushing releases the captivating aroma of the freshly-made red pepper flakes, filling your kitchen with a spicy, invigorating scent. The texture of your chili pepper flakes should be coarse, adding both flavor and visual appeal to your dishes. If you appreciate zesty snacks, you might also enjoy Zucchini Pizza Boats.

4. Storage Tips
Proper storage is key to preserving the vibrant flavor and potency of your homemade chili pepper flakes. To keep them fresh and prevent moisture absorption (which can lead to clumping and loss of flavor), store them in a cool, dark place, away from direct sunlight and heat. An airtight glass jar is ideal; ensure the lid is tightly sealed to create a barrier against air and humidity. With proper storage, your homemade chili flakes can maintain their optimal flavor and heat for several months, allowing you to enjoy their fiery goodness long after you’ve made them. Don’t forget to label your jar with the date of creation to keep track of freshness!
5. Serving Suggestions
The culinary possibilities are endless with your freshly-made crushed chili pepper! A simple sprinkle can instantly enhance a wide variety of dishes, adding both heat and depth of flavor. Sprinkle it generously over pizzas for that extra kick, stir it into pasta sauces for a spicy twist, or add a pinch to soups and stews to warm you from the inside out. You can also get creative and mix it into olive oil for a flavorful and spicy dipping sauce, perfect for crusty bread or drizzling over roasted vegetables. For a more intense flavor infusion, use your red pepper flakes in marinades for meats and vegetables, infusing them with a delectable spicy kick. Check out Flat Iron Pepper Company if you want to buy different types of chili flakes.
6. FAQs
What are the health benefits of chili pepper flakes?
Chili pepper flakes are more than just a spice; they’re packed with health benefits! They are a rich source of antioxidants that help protect your body against damage from free radicals. Additionally, the capsaicin in chili flakes may boost your metabolism, aiding in weight management, and improve digestion by stimulating digestive enzymes. They also possess anti-inflammatory properties, potentially reducing inflammation and pain. For another boost, try our Roasted Beet Hummus Toast.
Can I use other types of peppers?
Absolutely! One of the best parts about making your own chili flakes is the freedom to experiment with different types of peppers. While red chili peppers are the most common choice, you can use a variety of other peppers to achieve different heat levels and flavor profiles. Jalapeños will add a milder heat with a slightly fruity flavor, while cayenne peppers will bring a more intense, fiery punch. Consider exploring other options like Serrano, Fresno, or even Habanero peppers (use with caution!) to create a truly unique and personalized blend of chili pepper flakes.
How long do homemade chili pepper flakes last?
When stored properly in an airtight container in a cool, dark place, homemade chili pepper flakes can last for up to a year. However, for the best flavor and potency, it’s recommended to use them within 6 months. Over time, the volatile oils in the peppers can dissipate, leading to a gradual loss of flavor and heat. To maximize their shelf life, avoid exposing your chili flakes to air, moisture, and direct sunlight.
Can I make chili pepper flakes without drying them?
While drying is absolutely essential for creating traditional crushed chili pepper flakes with the right texture and concentrated flavor, you can certainly use fresh chili peppers in some dishes if you prefer a more vibrant and slightly different taste. Fresh chili peppers will have a higher water content and a slightly “greener” flavor compared to dried flakes. If using fresh peppers, be sure to use them sparingly, as their heat level can be more intense. They would be perfect in something like Vegan Lentil Tacos.
7. Conclusion
Making your own chili pepper flakes is not only an easy and cost-effective way to add a fiery kick to your culinary creations, but it’s also a deeply rewarding experience. From the satisfying process of transforming fresh peppers into potent flakes to the vibrant flavors and intense heat of your homemade mixture, every step is a testament to the power of simple, whole ingredients. So why not embark on this spicy adventure and discover the joy of crafting your own chili flakes? Your taste buds will thank you for the unforgettable flavor experience!
Print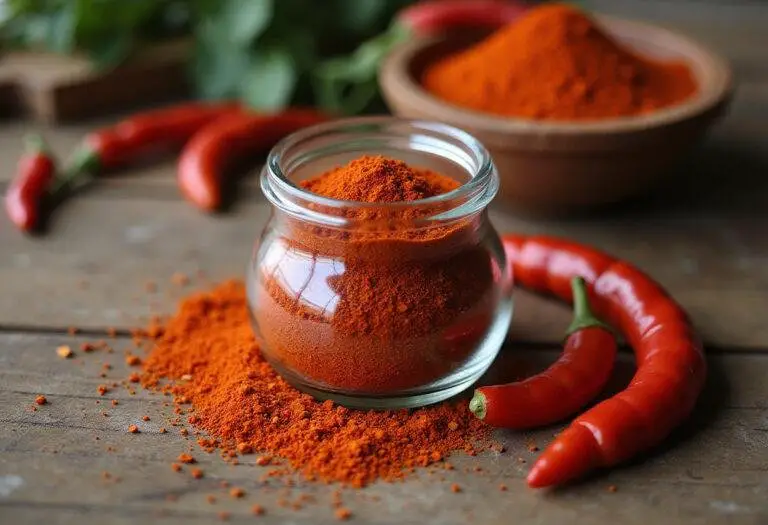
Chili Red Pepper Flakes
Chili Red Pepper Flakes are a fiery addition to your culinary adventures, offering fresh and vibrant flavors that enhance a variety of dishes. Making your own at home is easy and rewarding!
- Total Time: 6-8 hours 10 minutes
- Yield: 1 jar
Ingredients
- Fresh red chili peppers (about 10-15 for a batch)
- Oven or dehydrator (for drying)
- Mortar and pestle or spice grinder
- Glass jar for storage
Instructions
- Rinse the fresh red chili peppers under cool water to remove dirt and impurities.
- Slice the fresh red chili peppers in half lengthwise for quicker drying.
- Arrange sliced chili peppers on a baking sheet and dry them in the oven at the lowest setting for 6-8 hours until they become brittle.
- Crush the dried chili peppers into flakes using a mortar and pestle or spice grinder.
Notes
- Store chili pepper flakes in a cool, dark place in an airtight glass jar for maximum freshness.
- Label your jar with the creation date to track freshness.
- Experiment with other types of peppers for different flavors.
- Prep Time: 10 minutes
- Cook Time: 6-8 hours
- Category: Condiment
- Method: Drying and Crushing
- Cuisine: Various
- Diet: Vegan
Nutrition
- Serving Size: 1 teaspoon
- Calories: 6 Kcal
- Sugar: 0 g
- Sodium: 1 mg
- Fat: 0.3 g
- Saturated Fat: 0 g
- Unsaturated Fat: 0.1 g
- Trans Fat: 0 g
- Carbohydrates: 1 g
- Fiber: 0.5 g
- Protein: 0.3 g
- Cholesterol: 0 mg
8 thoughts on “Chili Red Pepper Flakes”