
🧀 The Beginner-Friendly Charcuterie Board: Effortless Elegance for impromptu Guests & Quick Parties
1. Introduction
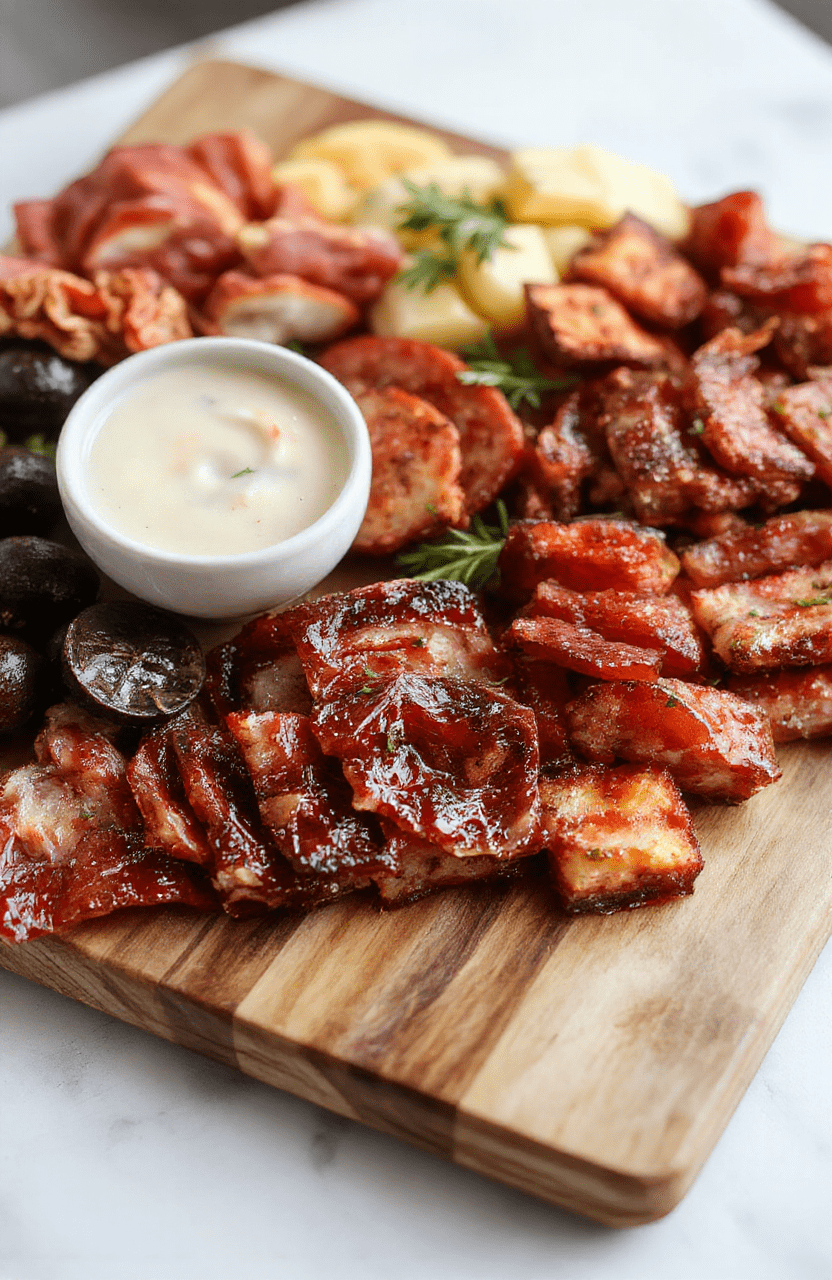
Looking for a stress-free, stylish, and delicious way to welcome guests—or just treat yourself after a long day? The beginner charcuterie board is your new best friend. Think rich, creamy cheeses, savory cured meats, sweet fruit, crunchy nuts, and a few artisanal crackers—all artfully arranged on one simple platter. There’s no cooking required, no special skills needed, and *definitely* no pressure to be a gourmet pro. This easy charcuterie board comes together in under 15 minutes, yet looks like it belongs on the menu at your favorite upscale bistro. Its no-fuss appetizer appeal makes it perfect for last-minute gatherings, holiday overflow snacks, or even a romantic evening starter.
2. Why You’ll Love This Recipe
- Ready in 15 minutes or less—no oven, no stovetop, no cleanup chaos
- Highly customizable—switch ingredients based on what’s in your fridge or dietary preferences
- Scalable for any crowd—serve two or twenty with minimal added effort
- No fancy tools required (though a few smart ones *really* help—see our top pick list below!)
- Double duty as dinner—add more protein and carbs for a satisfying light meal
3. Ingredient Notes
The art of the beginner charcuterie board lies not in rarity, but in thoughtful pairing. Here’s how to build a balanced, crowd-pleasing board—without breaking the bank or hunting down obscure items at specialty stores.
Cheeses: Aim for 2–3 varieties with contrasting textures and intensities. A soft, a semi-soft, and a hard cheese covers all bases. For beginners, go with:
- Brie or Camembert – A mild, buttery soft cheese that melts slightly at room temp andpairs beautifully with fruit
- Manchego or Aged Cheddar – Firm, nutty, and slightly sharp; adds punch and structure
- Gouda (especially Amsterdam Aged or Smoked) – Caramel-like sweetness with a luxurious bite
Meats: Cured meats shouldn’t be overpowering—just savory and satisfying. Use a mix of thin-sliced varieties:
- Prosciutto – Light, salty, and elegant; drape it in ribbons for visual appeal
- S/oppressata or Calabrese salami – Spicier and more robust; roll or fold for texture contrast
- Genoa or Serrano ham – A gentler alternative for those who prefer less pepper
Fruits & Sweet Accents: Sweet items balance salt and fat. Use fresh, dried, and preserved options:
- Red grapes or sliced firm pears – Fresh, juicy, and naturally elegant
- Fig jam or quince paste (membrillo) – A luxurious spread on cheese or meat—don’t skip!
- Dried apricots or dates – Add chewy sweetness and a pop of color
Crunchy Elements: These provide sensory contrast and help stabilize cheese slices:
- Artisan crackers or sliced baguette – Toasted for extra crispness if time allows
- Raw almonds, walnuts, or pistachios – Toast them quickly in your air fryer (more on that in the tool section!) for 90 seconds to unlock deep, nutty aroma
Optional但 Recommended Add-Ons:
- A small bowl of whole grain mustard or honey for dipping
- A few dark chocolate shards or sea salt flakes for a final finishing touch
4. Kitchen Tools You Need
While minimal is better for a beginner charcuterie board, a few well-chosen tools make the experience faster, prettier, and more fun. Since I believe in equipping your kitchen with smart, reliable gadgets—especially when hosting—I’ve curated a list of some of my most-loved and high-performing appliances and accessories:
For those who love to prep ahead, the Compact 6-in-1 Digital Air Fryer by Amazon Basics is a game-changer—a quick toast for baguette rounds or a 2-minute roast for nuts takes zero effort and leaves the oven cool. If you’re building more than just charcuterie and want one-piece cookware for sides (roasted veggies, dips, or even a backup mini quiche), the T-fal 14-Piece Hard Anodized Nonstick Cookware Set is incredibly durable and cleans up in seconds.
Want to go deeper into the charcuterie lifestyle? The Ninja Foodi Smart XL Indoor Grill & Air Fryer Combo doubles as a grill for bread or even a quick sear on cheese, while the Breville Nespresso Vertuo Creatista Espresso & Coffee Maker makes a perfect post-snack pick-me-up. And if you love pairing sweet endings with your savory board, the KitchenAid Artisan 5-Quart Stand Mixer in Scorched Orange helps whip up a quick honey-lavender shortbread for finishing touches.
Need storage for leftovers or weekly meal prep? The JoyJolt Airtight Glass Food Storage Set keeps fruits, nuts, and spreads fresh and visible—plus, glass feels more premium for storing your jam and honey jars. And for documenting your favorite board combos (yes, I journal mine!), the Clever Fox DIY Family Recipe Journal lets you build a library of favorite pairings across seasons.
Our Top Pick for Minimalist Hosting: Fullstar Ultimate Veggie Prep Master
This versatile tool—including slicing, dicing, grating, and peeling—helps you prep fruit slices, cheese cubes, and veggies in seconds. It’s perfect when you’re short on time but want uniform, restaurant-style presentation. Check it out here.
5. How to Make Your Beginner-Friendly Charcuterie Board
The secret? Don’t overthink the layout. Think “controlled chaos”—abundant, inviting, and beautifully imperfect. Here’s your step-by-step plan.
Phase 1: Prepping the Base (5 minutes)
Grab a large wooden board, slate platter, or even a clean baking sheet lined with parchment. Wipe it clean—it becomes part of the aesthetic! Set out small ramekins or bowls for spreadables (jam, mustard) and place them first. One in each corner or along the top third gives you symmetry and balance. Don’t fill them too full—1–2 tablespoons is plenty.
Phase 2: Cheese & Meat Arrangement (4 minutes)
Put your cheeses on the board first. Remove them from the fridge 20–30 minutes before serving so they come to room temperature and develop full flavor (cold cheese tastes bland!). Cut some cheeses into wedges or cubes for easy grabbing, leave others whole (especially soft cheeses like brie) for visual impact. Fold or roll cured meats: prosciutto into loose ruffles, salami into half-moons or tight scrolls.
Pro tip: Place heavier or taller items (wedges, bowls) first—then layer meats around or over them like draped mantles. The visual flow should invite your guests’ eyes and hands.
Phase 3: Fruits, Nuts & Crunch (3 minutes)
Fruit should act as natural filler and color. Scatter grapes in clusters, slice pears thin, add halved figs. Distribute dried fruit and nuts in small piles around the board—not too evenly, just abundant. Nestle crackers and bread slices in open spaces, breaking larger ones if needed. Add final touches with a sprinkle of sea salt or flaky herb salt over the cheese.
Optional finishing touch: Drizzle a *light* spoonful of honey over the cheese (avoid overdoing it—you don’t want a soggy mess!).
Phase 4: Presentation & Serving (1 minute)
Add small serving utensils: cheese knives, toothpicks, or even just elegant forks. Label cheeses if you’re feeling extra (especially on a party scale), using chalkboard stickers or small notecards. Serve immediately—or prep 1 hour ahead and refrigerate, bringing out 15 minutes before guests arrive.
6. Expert Tips for Success
After hundreds of boards, here’s what I’ve learned from trial (and a few crumbled crackers):
1. Salt is your friend—but balance it. Too much salt can overwhelm. Balance with sweet, creamy, or tangy items. Always include at least one sweet accent (jam, fruit, honey).
2. Avoid overloading—more is not always better. A board with 6 cheeses and 10 meats feels cluttered and confusing. Stick to 3 cheeses, 2–3 meats, 2–3 fruits, and 1–2 crunchy items. You can always add more in a second round.
3. Bring everything to room temp. Cold cheese tastes bland, cold meat feels waxy. Letting it sit for 20 minutes dramatically improves texture and aroma.
4. Keep a backup snack on hand. Sometimes guests arrive early, or a side salad takes longer. A small dish of olives or marinated beans in your fridge gives you a no-fuss add-in.
7. Variations & Substitutions
Need to adapt this board for dietary needs? Here’s how:
Vegan charcuterie board: Swap cheeses for cashew-based or almond cheeses, use smoked tofu or jackfruit instead of meat, and double up on roasted veggies (peppers, zucchini), artichokes, and bean-based dips (hummus, white bean dip).
Gluten-free: Serve with rice crackers, rice chips, or fresh veggie sticks (cucumber, bell pepper, carrot). A slice of gluten-free baguette works, too—just double-check the label.
Halal/Kosher: Choose certified meats and cheeses, and ensure all items are lab-free or certified as required. Many farms now produce halal salami and halal-certified prosciutto alternatives.
Low-sodium option: Skip the salted nuts, use unsalted crackers, and choose mild cheeses like mozzarella or fresh goat cheese. Add fresh herbs (thyme, rosemary) for extra flavor without sodium.
8. Storage & Reheating
Charcuterie boards are best served fresh, but with smart planning, you can prep ahead:
- Cheeses: Wrap tightly and refrigerate up to 5 days. Let sit 20–30 minutes before serving.
- Fruit: Slice apples/pears after brushing with lemon water to prevent browning; refrigerate up to 2 days.
- Meats: Store airtight up to 5 days, but texture can dry out—serve at room temp and drizzle with a little olive oil if needed.
- Pre-assembled board: If storing, cover loosely with parchment and plastic wrap. Keep in the fridge no longer than 4 hours—rearrange and refresh just before serving. Reheat only optional warm items (like toast or roasted nuts) in your Ninja Air Fryer Pro for 60 seconds before serving.
9. FAQ
How much food do I need per person?
For a full snack platter: aim for 1–2 oz of cheese, 1–1.5 oz of meat, 1–2 oz of carbs, and a few fruit/nut bites per person. For appetizer-only (before dinner), half that amount works well.
What’s the easiest cheese to slice?
Go for semi-firm cheeses like aged Gouda, Manchego, or Monterey Jack. Keep them slightly cool—not fridge-cold—so they slice cleanly. A serrated knife works best for soft cheeses like brie.
Can I make this board meat-free?
Absolutely! Focus on rich cheeses, roasted vegetables (like eggplant or red peppers), marinated legumes, hummus, and nuts. Add umami with olives, capers, or sun-dried tomatoes.
Do I need expensive items to impress?
Nope! A $20 budget board can be just as beautiful as a $50 one. Store brands often offer excellent cheeses and crackers. The key is thoughtful arrangement—not price tags.
10. Conclusion
There’s something deeply satisfying about pulling out a beautiful charcuterie board and watching guests gather around it—no questions asked, just nibbling, laughing, and sharing. This beginner-friendly charcuterie board delivers elegance with ease, giving you confidence and calm in even the busiest moments. Whether it’s for Sunday guests or a solo “me time” snack, it proves that joyful entertaining doesn’t have to be complicated. Now go grab your board, pour a glass of wine, and enjoy the art of simple, delicious living.
Print
Beginner Friendly Charcuterie Board
A simple, no-fuss charcuterie board perfect for beginners—just assemble your favorite meats, cheeses, and snacks on a board for a ready-to-serve party appetizer.
- Total Time: 10 minutes
- Yield: 4–6 servings
Ingredients
- 1 large wooden board or platter
- 4 oz cured meats (e.g., salami, prosciutto, or gen salami), sliced
- 4 oz soft cheese (e.g., brie or camembert), rind on
- 4 oz semi-hard cheese (e.g., aged cheddar or gouda), cubed or sliced
- 1 cup grapes, halved if large
- 1/2 cup mixed olives (green or black)
- 1/4 cup fig jam or honey, served in a small bowl or dolloped on board
- 10–12 crackers (e.g., water crackers or breadsticks)
- Fresh figs or apple slices (optional)
Instructions
- Place the wooden board on a stable surface.
- Add small bowls or ramekins for jam/honey and olives.
- Arrange cheeses on opposite corners or center—cut or cube ahead for easy serving.
- Fold or roll meats and fan them out or stack neatly.
- Fill in empty spaces with grapes, crackers, and optional fruit.
- Serve immediately or chill for 15 minutes for firmer cheeses.
Notes
- Ensure allergens like dairy or gluten are marked if serving敏感人群.
- For vegetarian guests, swap meats for extra nuts, roasted veggies, or marinated chickpeas.
- Prep tip: Gather all ingredients before assembling—speeds things up and reduces stress.
- Prep Time: 10 minutes
- Cook Time: 0 minutes
- Method: Assemble
- Cuisine: American
- Diet: Contains Dairy, Contains Gluten (if crackers included)
Nutrition
- Serving Size: 1 serving (assumes 6 servings)
- Calories: 320 Kcal
- Sugar: 8g
- Sodium: 680mg
- Fat: 24g
- Saturated Fat: 10g
- Unsaturated Fat: 12g
- Trans Fat: 0g
- Carbohydrates: 16g
- Fiber: 2g
- Protein: 14g
- Cholesterol: 45mg